Showing posts with label Pork. Show all posts

Tuesday, 14 June 2016


In need of a quick small filler dish? This is an easy way to get an extra dish in with almost no effort at all.
This is almost like the egg custard dish but with meat so it honestly doesn't look as smooth since the meat underneath will affect how the egg on top looks.

I normally cook this with pork, but it can be done with chicken as well.
If the meat is too lean, it will be dry and tough. So it's good to go with a medium fat meat which is why pork is so good to use.
If using chicken, I would only use dark meat.

You can make this any size you want. This is perfect for steaming in your rice cooker when you're cooking rice if your plate fits.

Steamed Minced Meat and Egg

Ingredients

  • 300g Minced Pork/chicken
  • 5 Eggs
  • 5 Egg Shells of Water
  • Soy Sauce
  • Sugar

Directions

  1. Mix the chicken with the soy sauce and sugar.
  2. Pour the meat into the bottom of the steaming plate and flatten.
  3. In a small bowl, mix together 5 eggs with 5 egg shells full of water so it's a 1 to 1 ratio. When I crack the egg, I save half and use that as my measuring cup and add 10 of those egg shell of water. Almost the same ratio as egg custard but a little less water because meat juice will flow out as you cook!
  4. If you want the top to be smoother, run the egg through a sieve. Can't have bubbles if you want that very smooth surface. If you really don't care, just gently pour on top of your meat.
  5. Wrap the dish with cling wrap.
  6. Pop it on top of your steaming device and bring water to a boil. Lower the heat to a gentle boil for 10 to 15 mins depending on how big your plate is. If it's in the rice cooker it'll be a little bit more cooked then it needs to be but it's definitely the easier way to cook this dish.
  7. And you're done. Feel free to garnish with chopped green onion and a little bit of fish soy sauce.
Tuesday, 14 June 2016 Agg

In need of a quick small filler dish? This is an easy way to get an extra dish in with almost no effort at all.
This is almost like the egg custard dish but with meat so it honestly doesn't look as smooth since the meat underneath will affect how the egg on top looks.

I normally cook this with pork, but it can be done with chicken as well.
If the meat is too lean, it will be dry and tough. So it's good to go with a medium fat meat which is why pork is so good to use.
If using chicken, I would only use dark meat.

You can make this any size you want. This is perfect for steaming in your rice cooker when you're cooking rice if your plate fits.

Steamed Minced Meat and Egg

Ingredients

  • 300g Minced Pork/chicken
  • 5 Eggs
  • 5 Egg Shells of Water
  • Soy Sauce
  • Sugar

Directions

  1. Mix the chicken with the soy sauce and sugar.
  2. Pour the meat into the bottom of the steaming plate and flatten.
  3. In a small bowl, mix together 5 eggs with 5 egg shells full of water so it's a 1 to 1 ratio. When I crack the egg, I save half and use that as my measuring cup and add 10 of those egg shell of water. Almost the same ratio as egg custard but a little less water because meat juice will flow out as you cook!
  4. If you want the top to be smoother, run the egg through a sieve. Can't have bubbles if you want that very smooth surface. If you really don't care, just gently pour on top of your meat.
  5. Wrap the dish with cling wrap.
  6. Pop it on top of your steaming device and bring water to a boil. Lower the heat to a gentle boil for 10 to 15 mins depending on how big your plate is. If it's in the rice cooker it'll be a little bit more cooked then it needs to be but it's definitely the easier way to cook this dish.
  7. And you're done. Feel free to garnish with chopped green onion and a little bit of fish soy sauce.

Wednesday, 8 June 2016


Once again, I would call this a base soup.
Once you get to know the flavour of different soup ingredients, you'll be able to play around mixing them up. Lots of soups are various of each other.

The reason why I call this the tangy green papaya soup is because of the use of green papaya and ginger. The ginger gives it a kick rather then focusing on the sweetness that usually comes with papaya soup.
Also, since green papaya is not ripe, it's not as sweet as a ripe papaya.

This is great for a smoothing soup with a bit of a kick.
It's pretty simple and easy to make too. :)

Tangy Green Papaya Soup

Ingredients

  • 1 Green Papaya (4lbs)
  • 1/2 cup red dates
  • 1/4 cup apricot kernel (1:3 ratio for north 北杏 and south apricot 南杏 seeds)
  • 1cm block of ginger
  • 1 - 1.5 lbs of pork bone
  • 4L of water
  • Salt optional

Directions

  1. Pre-treat the pork bone if it's not done already. Blanch the pork bone and then wash the bones.
  2. Start heating the 4L of water while you prep the other items. 
  3. Peel the papaya and cut it in half to remove all the seeds.
  4. Cut it into 1 inch strips.
  5. Rinse the red dates and the apricot seeds.
  6. Wash the ginger and slice it up
  7. Once the water is boiled, put all the ingredients in except the salt.
  8. Bring it back up to a rolling boil and then turn down the heat to medium low so that it's at a soft boil.
  9. Let it cook for 1.5 hours
  10. Before you turn off the heat add salt and stir if you wish to add salt.
And there you have it. Simple green papaya soup with a kick.
Wednesday, 8 June 2016 Agg

Once again, I would call this a base soup.
Once you get to know the flavour of different soup ingredients, you'll be able to play around mixing them up. Lots of soups are various of each other.

The reason why I call this the tangy green papaya soup is because of the use of green papaya and ginger. The ginger gives it a kick rather then focusing on the sweetness that usually comes with papaya soup.
Also, since green papaya is not ripe, it's not as sweet as a ripe papaya.

This is great for a smoothing soup with a bit of a kick.
It's pretty simple and easy to make too. :)

Tangy Green Papaya Soup

Ingredients

  • 1 Green Papaya (4lbs)
  • 1/2 cup red dates
  • 1/4 cup apricot kernel (1:3 ratio for north 北杏 and south apricot 南杏 seeds)
  • 1cm block of ginger
  • 1 - 1.5 lbs of pork bone
  • 4L of water
  • Salt optional

Directions

  1. Pre-treat the pork bone if it's not done already. Blanch the pork bone and then wash the bones.
  2. Start heating the 4L of water while you prep the other items. 
  3. Peel the papaya and cut it in half to remove all the seeds.
  4. Cut it into 1 inch strips.
  5. Rinse the red dates and the apricot seeds.
  6. Wash the ginger and slice it up
  7. Once the water is boiled, put all the ingredients in except the salt.
  8. Bring it back up to a rolling boil and then turn down the heat to medium low so that it's at a soft boil.
  9. Let it cook for 1.5 hours
  10. Before you turn off the heat add salt and stir if you wish to add salt.
And there you have it. Simple green papaya soup with a kick.

Saturday, 14 May 2016


I remember the first time my dad made this dish, I was very very skeptical of the preserved veggie. But after tasting it, I was hooked.
He use to make this with pork belly, but I've discovered that pork picnic shoulder can be used as well for a leaner choice. It's not as soft as pork belly, but when braised, it'll fall apart like pulled pork. Just not as moist. But since it's braised, when you eat it in the liquid it's quite good.
It's easier to cook as well since you don't have to precook it like you do pork belly to cook out some of the oil.

Also, it's honestly better prepared in advance so it can sit and the flavours have more time to meld together. So you can cook this at night, leave it overnight and throw it in the fridge the next morning. Then skim the oil before you reheat to eat.

All you need is a big pot to throw everything in. Once the pork is soft it's ready to eat.

Braised Pork with Preserved Mustard (梅菜猪肉)

Ingredients

  • 1 bag of Preserved Mustard 梅菜
  • 1 Pork Picnic Shoulder
  • 1 big chunk of Rock Sugar
  • 2 tbsp of Soy Sauce
  • 1 cm thick block of ginger, sliced
  • water

Directions

  1. Use a bowl to wash the preserved mustard. You will want to go through several bowls of water to wash off the dirt and as much salt as possible. The picture to the right is after 4 bowls of water. The first bowl is quite scary to look at.
  2. Once it's all washed, cut the veggie. I cut them into 4in long pieces.
  3. Wash your pork and cut the pork into chunks. The smaller the chunks the faster it'll cook. So pending on how much time, you can decide how big to cut it.
  4. Slice your ginger.
  5. In a pot, heat up 1/3 pot of water until boiling.
  6. Add the soy sauce, sugar and ginger.
  7. Add the pork and vegetable. 
  8. Add more water so that it just covers everything in the pot.
  9. Bring to a boil. Keep the pot at a soft boil until the meat is soft and cooked.
  10. Then it's ready to eat or save until the next day. The flavour gets better and better when it has more time to sit and meld .:)
Saturday, 14 May 2016 Agg

I remember the first time my dad made this dish, I was very very skeptical of the preserved veggie. But after tasting it, I was hooked.
He use to make this with pork belly, but I've discovered that pork picnic shoulder can be used as well for a leaner choice. It's not as soft as pork belly, but when braised, it'll fall apart like pulled pork. Just not as moist. But since it's braised, when you eat it in the liquid it's quite good.
It's easier to cook as well since you don't have to precook it like you do pork belly to cook out some of the oil.

Also, it's honestly better prepared in advance so it can sit and the flavours have more time to meld together. So you can cook this at night, leave it overnight and throw it in the fridge the next morning. Then skim the oil before you reheat to eat.

All you need is a big pot to throw everything in. Once the pork is soft it's ready to eat.

Braised Pork with Preserved Mustard (梅菜猪肉)

Ingredients

  • 1 bag of Preserved Mustard 梅菜
  • 1 Pork Picnic Shoulder
  • 1 big chunk of Rock Sugar
  • 2 tbsp of Soy Sauce
  • 1 cm thick block of ginger, sliced
  • water

Directions

  1. Use a bowl to wash the preserved mustard. You will want to go through several bowls of water to wash off the dirt and as much salt as possible. The picture to the right is after 4 bowls of water. The first bowl is quite scary to look at.
  2. Once it's all washed, cut the veggie. I cut them into 4in long pieces.
  3. Wash your pork and cut the pork into chunks. The smaller the chunks the faster it'll cook. So pending on how much time, you can decide how big to cut it.
  4. Slice your ginger.
  5. In a pot, heat up 1/3 pot of water until boiling.
  6. Add the soy sauce, sugar and ginger.
  7. Add the pork and vegetable. 
  8. Add more water so that it just covers everything in the pot.
  9. Bring to a boil. Keep the pot at a soft boil until the meat is soft and cooked.
  10. Then it's ready to eat or save until the next day. The flavour gets better and better when it has more time to sit and meld .:)

Wednesday, 4 May 2016


Here's another easy basic soup.
Honestly most soups will have 4-5 ingredients as base with lots of optional things you can add for flavour and other goodness.

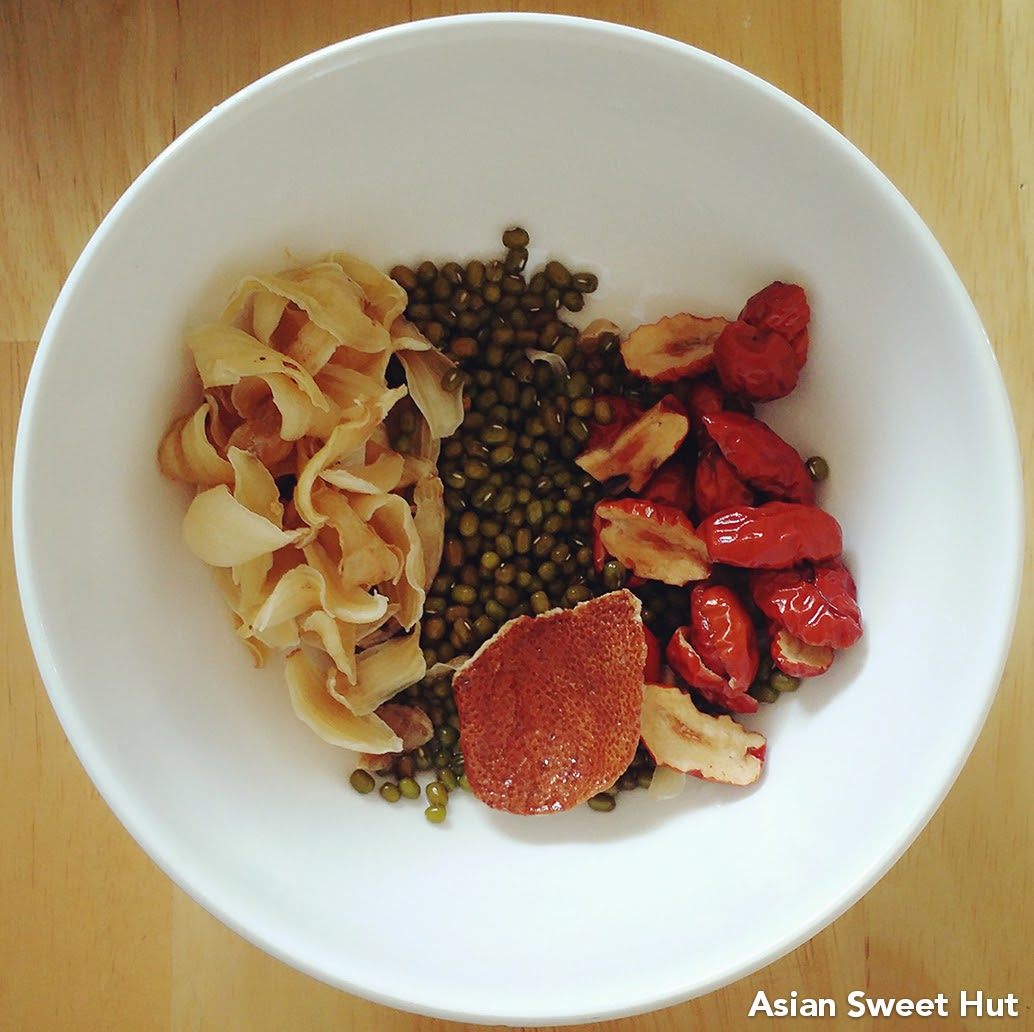
This particular one is simple and pretty mellow tasting. The green bean is considered to be "cold" so for sweetness, instead of honey date or logan fruit, I use red dates to balance out the "cold".

Green Bean, Lily Bulb and Red Date Soup

Ingredients

  • 40g Green Beans
  • 30g Lily Bulb 百合
  • 5 large or 10 small Red Dates 
  • 1 Tangerine Peel 果皮
  • 1 lbs of Pork Bone
  • 4-5 L of water
  • Salt to taste

Directions

  1. If your pork bone is not pre-blanched and you like to have your soup clear, quickly blanch the pork bones in boiling water for 5 mins, then wash the pork bone.
  2. Rinse the green beans, lily bulb and red dates.
  3. Soak the tangerine peel in water and scrap off some of the whites when it's soft.
  4. Heat 4 L of water in a large pot.
  5. Once the water is boiling, add the pork bone.
  6. When it comes back to a rolling boil, add the green beans, lily bulb, red dates and tangerine peel.
  7. Drop the heat down to a soft boil and let it cook for 1.5 hours. Check the soup once in a while to make sure it's still softly boiling to make sure you're not over or under cooking the soup.
  8. At the end of the 1.5 hours, add salt if you wish. Stir and turn off the heat.
  9. Skim the fat and you're good to go.
Enjoy!
Wednesday, 4 May 2016 Agg

Here's another easy basic soup.
Honestly most soups will have 4-5 ingredients as base with lots of optional things you can add for flavour and other goodness.

This particular one is simple and pretty mellow tasting. The green bean is considered to be "cold" so for sweetness, instead of honey date or logan fruit, I use red dates to balance out the "cold".

Green Bean, Lily Bulb and Red Date Soup

Ingredients

  • 40g Green Beans
  • 30g Lily Bulb 百合
  • 5 large or 10 small Red Dates 
  • 1 Tangerine Peel 果皮
  • 1 lbs of Pork Bone
  • 4-5 L of water
  • Salt to taste

Directions

  1. If your pork bone is not pre-blanched and you like to have your soup clear, quickly blanch the pork bones in boiling water for 5 mins, then wash the pork bone.
  2. Rinse the green beans, lily bulb and red dates.
  3. Soak the tangerine peel in water and scrap off some of the whites when it's soft.
  4. Heat 4 L of water in a large pot.
  5. Once the water is boiling, add the pork bone.
  6. When it comes back to a rolling boil, add the green beans, lily bulb, red dates and tangerine peel.
  7. Drop the heat down to a soft boil and let it cook for 1.5 hours. Check the soup once in a while to make sure it's still softly boiling to make sure you're not over or under cooking the soup.
  8. At the end of the 1.5 hours, add salt if you wish. Stir and turn off the heat.
  9. Skim the fat and you're good to go.
Enjoy!

Tuesday, 26 April 2016


I had left over celery from making an other dish so I decided to make a stir fry with it.
It's super easy. The most time consuming thing in a stir fry is to cut everything up to the right size. Other then that, heat up your wok and off you go.

Pork celery and shiitake mushroom

Ingredients

  • 300g pork, sliced
  • Half a stalk of celery
  • 4 shiitake mushroom
  • 2 cloves of garlic, minced
  • 1/4 cup of cashew (optional)
  • 1 tbsp splash of rice wine
  • 1/2 tbsp oyster sauce
  • 1 tsp sugar
  • 1/2 tbsp corn starch
  • 1/4 cup water

Directions

  1. Soak the shiitake mushrooms for at least an hour to re-hydrate. Squeeze the water out once it's re-hydrated. 
  2. Slide the pork into thin slices.
  3. Cut the celery into 1 inch pieces. 
  4. Mince the garlic.
  5. Heat up the wok to medium heat.
  6. Add in a bit of oil and the garlic. Stir it around so it doesn't burn.
  7. Add the pork and the shiitake mushrooms and stir it.
  8. When the pork is about 80% cooked, added the celery and quickly stir..
  9. In a bowl mix oyster sauce, sugar, corn starch and water. 
  10. Deglaze the wok with the rice wine.
  11. Make a whole in the middle of the wok and add the sauce mixture.
  12. Once it starts to thicken up and bubble mix turn off the heat and mix everything together. 
  13. Plate and top with cashews.
Tip: during cooking, if more liquid appears in the pan, you might need a little more corn starch. If you do, just add a bit more corn starch to more water and mix it in to thicken the sauce some more.
Tuesday, 26 April 2016 Agg

I had left over celery from making an other dish so I decided to make a stir fry with it.
It's super easy. The most time consuming thing in a stir fry is to cut everything up to the right size. Other then that, heat up your wok and off you go.

Pork celery and shiitake mushroom

Ingredients

  • 300g pork, sliced
  • Half a stalk of celery
  • 4 shiitake mushroom
  • 2 cloves of garlic, minced
  • 1/4 cup of cashew (optional)
  • 1 tbsp splash of rice wine
  • 1/2 tbsp oyster sauce
  • 1 tsp sugar
  • 1/2 tbsp corn starch
  • 1/4 cup water

Directions

  1. Soak the shiitake mushrooms for at least an hour to re-hydrate. Squeeze the water out once it's re-hydrated. 
  2. Slide the pork into thin slices.
  3. Cut the celery into 1 inch pieces. 
  4. Mince the garlic.
  5. Heat up the wok to medium heat.
  6. Add in a bit of oil and the garlic. Stir it around so it doesn't burn.
  7. Add the pork and the shiitake mushrooms and stir it.
  8. When the pork is about 80% cooked, added the celery and quickly stir..
  9. In a bowl mix oyster sauce, sugar, corn starch and water. 
  10. Deglaze the wok with the rice wine.
  11. Make a whole in the middle of the wok and add the sauce mixture.
  12. Once it starts to thicken up and bubble mix turn off the heat and mix everything together. 
  13. Plate and top with cashews.
Tip: during cooking, if more liquid appears in the pan, you might need a little more corn starch. If you do, just add a bit more corn starch to more water and mix it in to thicken the sauce some more.

Tuesday, 19 April 2016


This recipe is inspired by Just Bento's cabbage rolls.
Usually the napa cabbage I buy are so big that I usually make giant cabbage rolls, but i found that if I cut the cabbage in half, I can make smaller 2 bite rolls.

For this roll, I make a dumpling like filling with shiitake mushrooms, dried scallops and mini dried shrimp. Asian flavours for an Asian cabbage roll.

Napa Cabbage Rolls

Ingredients 

  • 6 Short (and fat) napa cabbage leaves, cut in half for 12 or 12 small leaves
  • 300g Ground pork
  • 3 Shiitake mushrooms
  • 1 big dried scallop or 2 small ones
  • 1 tbsp mini dried shrimp
  • 1/2 tsp sugar
  • 1 tbsp low sodium soy sauce
  • 1 tsp corn starch

Directions

  1. Soak the shiitake mushrooms and dried scallop for several hours to re-hydrate. If you do not have several hours, soak in warm water to hasten the process. 
  2. If the cabbage leaves you're using is really wide, you can cut it in half down to middle to make it skinnier. But make sure you can still wrap it around the meat when it's cut in half.
  3. Do a quick blanch of the leaves to soften them.
  4. Once the mushroom is re-hydrated, cut into small pieces and add it into a bowl with the meat.
  5. Shred the dried scallop and add it into the bowl with the meat and mushrooms
  6. Rinse the dried shrimp and lightly chop it into smaller pieces, add it into the bowl.
  7. Add the sugar, soy sauce and corn starch into the bowl and mix all together.
  8. Once it's all mix, spoon the mixture onto the soften napa cabbage leaves and roll.
  9. Tuck the tail of the cabbage into one of the sides.
  10. Your rolls should have a diameter of about 1 inch so it's a bite size roll. 
  11. Steam in a dish for 15 mins and you're ready to go!
Tuesday, 19 April 2016 Agg


This recipe is inspired by Just Bento's cabbage rolls.
Usually the napa cabbage I buy are so big that I usually make giant cabbage rolls, but i found that if I cut the cabbage in half, I can make smaller 2 bite rolls.

For this roll, I make a dumpling like filling with shiitake mushrooms, dried scallops and mini dried shrimp. Asian flavours for an Asian cabbage roll.

Napa Cabbage Rolls

Ingredients 

  • 6 Short (and fat) napa cabbage leaves, cut in half for 12 or 12 small leaves
  • 300g Ground pork
  • 3 Shiitake mushrooms
  • 1 big dried scallop or 2 small ones
  • 1 tbsp mini dried shrimp
  • 1/2 tsp sugar
  • 1 tbsp low sodium soy sauce
  • 1 tsp corn starch

Directions

  1. Soak the shiitake mushrooms and dried scallop for several hours to re-hydrate. If you do not have several hours, soak in warm water to hasten the process. 
  2. If the cabbage leaves you're using is really wide, you can cut it in half down to middle to make it skinnier. But make sure you can still wrap it around the meat when it's cut in half.
  3. Do a quick blanch of the leaves to soften them.
  4. Once the mushroom is re-hydrated, cut into small pieces and add it into a bowl with the meat.
  5. Shred the dried scallop and add it into the bowl with the meat and mushrooms
  6. Rinse the dried shrimp and lightly chop it into smaller pieces, add it into the bowl.
  7. Add the sugar, soy sauce and corn starch into the bowl and mix all together.
  8. Once it's all mix, spoon the mixture onto the soften napa cabbage leaves and roll.
  9. Tuck the tail of the cabbage into one of the sides.
  10. Your rolls should have a diameter of about 1 inch so it's a bite size roll. 
  11. Steam in a dish for 15 mins and you're ready to go!

Tuesday, 24 November 2015


Don't have time to cook?
Do you have a rice cooker?
If you said yes to both, then this will be perfect for you!

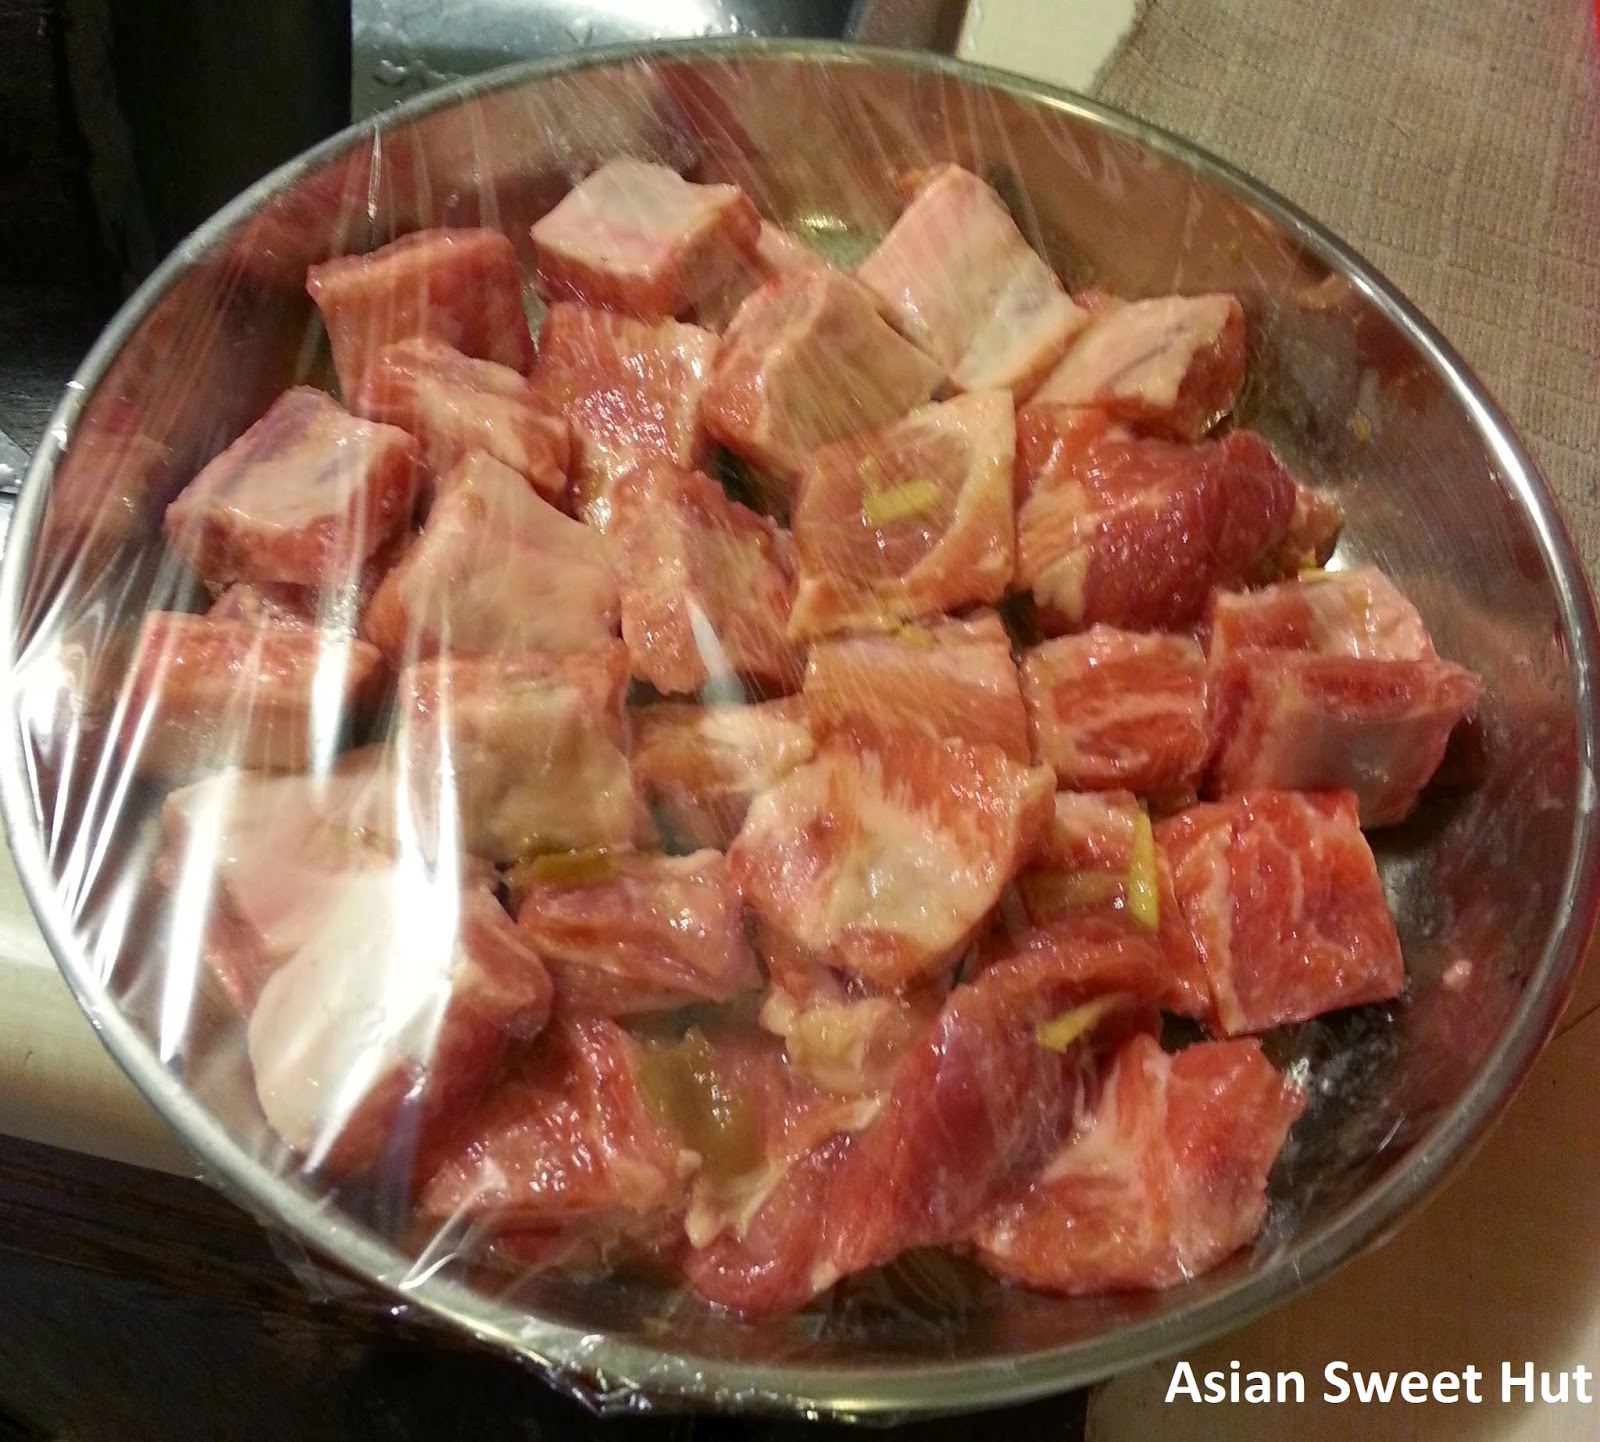
The key to this dish is to prep the night before. You want to marinate the meat overnight in the fridge so the flavour penetrates through so you do not loose any of the flavour when you cook the meat with the rice. If you marinate it over night, you also do not need to use as much seasoning as you would if you try to do it last minute.
Too much seasoning can result in very salty rice so you want to avoid that.

Prep time including washing the meat and cutting it is around 20 min.

Shiitake and Spare Ribs Rice Cooker Meal

Ingredients 

  • ~1lbs spare ribs
  • 3-5 Shiitake Mushrooms (up to your taste)
  • Optional 2-4 pieces of 雲耳 (to your taste)
  • 1/2 tsp sugar
  • 1/2 tsp soy sauce
  • 1 tsp Black Bean Garlic Sauce
  • 2g of julienned ginger
  • 1 tsp corn starch
  • 3 muks (rice cooker cup) of uncooked rice

Directions

  1. Wash the spare ribs.
  2. Cut the spare ribs so it's 1 bone per piece.
  3. Mix sugar, soy sauce and black bean garlic sauce together in a container that can fit all the meat.
  4. Add the meat to the container and mix well so all the meat is coated.
  5. Let it marinate overnight in the fridge.
  6. In the morning before you go to work, put the shittake mushroom and the 雲耳 into a bowl of water so it re-hydrates during the day. 
  7. When you're ready to cook the rice, mix the corn starch into the meat.
  8. Wash the rice as you normally do and add the normal amount of water to cook the rice.
  9. Squeeze the water out of the shittake mushroom and rinse it off.
  10. Cut each shittake mushroom into bite size pieces.
  11. If you're cooking with 雲耳, cut that up into 1 inch strips. (mine are usually around 1x0.5 inch strips).
  12. Julienne the ginger
  13. Add the meat to the rice cooker pot on top of the rice.
  14. Then add the mushroom and 雲耳.
  15. Sprinkle with ginger and make sure some of the ginger is touching the water to ensure that the ginger taste will make it all the way into the rice.
  16. Then turn on the rice cooker to cook and let it cook.
And that's all to it! All the work is during the prep. The cooking is easy. You can leave it alone and do other stuff like wash and cook veggies or work out etc :)
Tuesday, 24 November 2015 Agg

Don't have time to cook?
Do you have a rice cooker?
If you said yes to both, then this will be perfect for you!

The key to this dish is to prep the night before. You want to marinate the meat overnight in the fridge so the flavour penetrates through so you do not loose any of the flavour when you cook the meat with the rice. If you marinate it over night, you also do not need to use as much seasoning as you would if you try to do it last minute.
Too much seasoning can result in very salty rice so you want to avoid that.

Prep time including washing the meat and cutting it is around 20 min.

Shiitake and Spare Ribs Rice Cooker Meal

Ingredients 

  • ~1lbs spare ribs
  • 3-5 Shiitake Mushrooms (up to your taste)
  • Optional 2-4 pieces of 雲耳 (to your taste)
  • 1/2 tsp sugar
  • 1/2 tsp soy sauce
  • 1 tsp Black Bean Garlic Sauce
  • 2g of julienned ginger
  • 1 tsp corn starch
  • 3 muks (rice cooker cup) of uncooked rice

Directions

  1. Wash the spare ribs.
  2. Cut the spare ribs so it's 1 bone per piece.
  3. Mix sugar, soy sauce and black bean garlic sauce together in a container that can fit all the meat.
  4. Add the meat to the container and mix well so all the meat is coated.
  5. Let it marinate overnight in the fridge.
  6. In the morning before you go to work, put the shittake mushroom and the 雲耳 into a bowl of water so it re-hydrates during the day. 
  7. When you're ready to cook the rice, mix the corn starch into the meat.
  8. Wash the rice as you normally do and add the normal amount of water to cook the rice.
  9. Squeeze the water out of the shittake mushroom and rinse it off.
  10. Cut each shittake mushroom into bite size pieces.
  11. If you're cooking with 雲耳, cut that up into 1 inch strips. (mine are usually around 1x0.5 inch strips).
  12. Julienne the ginger
  13. Add the meat to the rice cooker pot on top of the rice.
  14. Then add the mushroom and 雲耳.
  15. Sprinkle with ginger and make sure some of the ginger is touching the water to ensure that the ginger taste will make it all the way into the rice.
  16. Then turn on the rice cooker to cook and let it cook.
And that's all to it! All the work is during the prep. The cooking is easy. You can leave it alone and do other stuff like wash and cook veggies or work out etc :)

Wednesday, 11 November 2015


Yes, it's possible to eat lotus root and not just in soup! When you cook it, it has a sweet flavour and crispy texture.
Probably not the best looking picture in the world since it's just meat patties but the flavour and texture is pretty awesome.

This is one of those rare recipes that I will use volume rather then weight for measurements.
I also like to make big batches of this and then freeze them in dinner size batch to make it an easy meal later.

I use minced pork butt or a mixture of pork butt and pork shoulder for this recipe if I want to go leaner.

Pork and Lotus Root Patties

Ingredients

  • 2lbs boneless pork butt
  • 1lb pork shoulder
  • 3 big pieces of lotus root
  • 3 tbsp soy sauce
  • 3 tbsp sugar

Directions

  1. First, remove the skin from the pork shoulder. Cube up the pork butt and pork shoulder into smaller pieces.
  2. Mix the meat together and use your grinder or food processor to mince the meat.
  3. While the meat is mixing, scrape off the outer skin of the lotus root with the back of a knife. It'll be all nice and white like the picture below when it's done.
  4. Cut off the ends of the lotus root.
  5. Cut off the lotus root into long pieces that will fit into the food processor's opening.
  6. Use the blade option to slice the lotus root thinly. Or you can use the shredding option as well. Both will work fine.
  7. Now that you have everything in pieces, you can start mixing everything together. In a big bowl or several big bowls, add the meat, lotus root, soy sauce and sugar together.
    The minimum ratio I would suggest is 1:1 volume for meat:lotus root (as shown in the picture to the right
    with a container). I would even go as far as 1:1.5 ratio for meat:lotus root so the crunchy texture will come out even more! So having said that, you may  not need to use all the meat you grounded up. But that's ok cause you can use it later for something else. Any left over meat, wrap and freeze or refrigerate for later use or just cook it right away.
  8. Once everything is mixed up, you can pan fry them up to eat right away, or package it up and freeze it for an easy meal on a different day.


Wednesday, 11 November 2015 Agg


Yes, it's possible to eat lotus root and not just in soup! When you cook it, it has a sweet flavour and crispy texture.
Probably not the best looking picture in the world since it's just meat patties but the flavour and texture is pretty awesome.

This is one of those rare recipes that I will use volume rather then weight for measurements.
I also like to make big batches of this and then freeze them in dinner size batch to make it an easy meal later.

I use minced pork butt or a mixture of pork butt and pork shoulder for this recipe if I want to go leaner.

Pork and Lotus Root Patties

Ingredients

  • 2lbs boneless pork butt
  • 1lb pork shoulder
  • 3 big pieces of lotus root
  • 3 tbsp soy sauce
  • 3 tbsp sugar

Directions

  1. First, remove the skin from the pork shoulder. Cube up the pork butt and pork shoulder into smaller pieces.
  2. Mix the meat together and use your grinder or food processor to mince the meat.
  3. While the meat is mixing, scrape off the outer skin of the lotus root with the back of a knife. It'll be all nice and white like the picture below when it's done.
  4. Cut off the ends of the lotus root.
  5. Cut off the lotus root into long pieces that will fit into the food processor's opening.
  6. Use the blade option to slice the lotus root thinly. Or you can use the shredding option as well. Both will work fine.
  7. Now that you have everything in pieces, you can start mixing everything together. In a big bowl or several big bowls, add the meat, lotus root, soy sauce and sugar together.
    The minimum ratio I would suggest is 1:1 volume for meat:lotus root (as shown in the picture to the right
    with a container). I would even go as far as 1:1.5 ratio for meat:lotus root so the crunchy texture will come out even more! So having said that, you may  not need to use all the meat you grounded up. But that's ok cause you can use it later for something else. Any left over meat, wrap and freeze or refrigerate for later use or just cook it right away.
  8. Once everything is mixed up, you can pan fry them up to eat right away, or package it up and freeze it for an easy meal on a different day.


Monday, 19 October 2015


The Chayote in the picture above is home grown so they might look a little different from store brought ones.
This is an other one of those dishes where there are many different variations.

The very basic of this dish is Chayote, meat, soy sauce, sugar and cornstarch.
The onion, garlic and 2 types of black fungus is actually all optional.
The onion and garlic will add more flavour so I always cook with it as long as I have some on hand. But the fungus doesn't add flavour, just nutritional value.
My mother in law only cooks this dish with 雲耳
My parents likes to cook with both 雲耳 and 木耳.
I like to cook with both because I find the texture of both to be slightly different and I enjoy mixing the 2 together.

If you google the word of both types of black fungus, it'll return the same name in English! So when you go shopping, write these words down to find them both.

Chayote Squash and Pork with 雲耳 and/or 木耳

Ingredients

  • 2 Chayote Squashes
  • 150g pork neck 
  • 1 small onion
  • 1 tsp minced garlic
  • 1/2 tsp soy sauce
  • 1/2 tsp sugar
  • handful of dried 雲耳 (optional)
  • 5 dried pieces of 木耳 (optional)

Directions

  1. Soak the dried 雲耳 and 木耳 for a couple of hours, or 30 mins in warm water.
  2. Peel the chayote. Use a fruit peeler. You may want to use gloves to peel the chayote. I find it'll make my hand peel but it doesn't affect my mom in the same way. So give it a try.
  3. Cut it in half. The seed is quite soft so you'll probably cut it right in half. Take the seed out. 
  4. Cut it into slices like you would for apple slices. 
  5. This is 雲耳
    Cut the onion into strips. 
  6. Cut the pork into thin strips and mix in a bowl with the soy sauce and sugar.
  7. Once you're done all this, the dried 雲耳 and 木耳 should be ready for use. They should have expanded a lot. 雲耳 expands a lot more then 木耳. 
  8. Lightly rub the expanded fungus to wash it. Rinse under the tap.
  9. Check the back of the 雲耳 to see if you need to cut off any connection points. It should be small segments of hard white ridges. 
  10. Cut it into 1 inch pieces so you can quickly and easily cook it. 
  11. There usually isn't connection points on 木耳 but check and 
    This is the back of  the 雲耳
    cut away if necessary. Then cut into similar size as the 雲耳.
  12. Heat a wok to medium heat, once it's warm add the oil, onion and garlic.
  13. Once you smell the mixture cooking, add the chayote slices. Stir and let it cook at medium heat.
  14. After 2-3 mins, add in the slice pork. Cook and stir. To speed up cooking time, cover for a bit in-between stir.
  15. When the pork is about 80% cooked, add in the 雲耳 and 木耳
  16. As usual, stir around to ensure it's getting cooked.
  17. Cover and cook for another 2 mins and cover again and let it cook until the pork is done.
  18. And you're good to go :)


Notes:
木耳 is firmer in texture where as 雲耳 can be softer.
Do not over cook either of them, especially 雲耳. It can be a bit slimy when overcooked so do not overcook it.
This is 木耳

Monday, 19 October 2015 Agg


The Chayote in the picture above is home grown so they might look a little different from store brought ones.
This is an other one of those dishes where there are many different variations.

The very basic of this dish is Chayote, meat, soy sauce, sugar and cornstarch.
The onion, garlic and 2 types of black fungus is actually all optional.
The onion and garlic will add more flavour so I always cook with it as long as I have some on hand. But the fungus doesn't add flavour, just nutritional value.
My mother in law only cooks this dish with 雲耳
My parents likes to cook with both 雲耳 and 木耳.
I like to cook with both because I find the texture of both to be slightly different and I enjoy mixing the 2 together.

If you google the word of both types of black fungus, it'll return the same name in English! So when you go shopping, write these words down to find them both.

Chayote Squash and Pork with 雲耳 and/or 木耳

Ingredients

  • 2 Chayote Squashes
  • 150g pork neck 
  • 1 small onion
  • 1 tsp minced garlic
  • 1/2 tsp soy sauce
  • 1/2 tsp sugar
  • handful of dried 雲耳 (optional)
  • 5 dried pieces of 木耳 (optional)

Directions

  1. Soak the dried 雲耳 and 木耳 for a couple of hours, or 30 mins in warm water.
  2. Peel the chayote. Use a fruit peeler. You may want to use gloves to peel the chayote. I find it'll make my hand peel but it doesn't affect my mom in the same way. So give it a try.
  3. Cut it in half. The seed is quite soft so you'll probably cut it right in half. Take the seed out. 
  4. Cut it into slices like you would for apple slices. 
  5. This is 雲耳
    Cut the onion into strips. 
  6. Cut the pork into thin strips and mix in a bowl with the soy sauce and sugar.
  7. Once you're done all this, the dried 雲耳 and 木耳 should be ready for use. They should have expanded a lot. 雲耳 expands a lot more then 木耳. 
  8. Lightly rub the expanded fungus to wash it. Rinse under the tap.
  9. Check the back of the 雲耳 to see if you need to cut off any connection points. It should be small segments of hard white ridges. 
  10. Cut it into 1 inch pieces so you can quickly and easily cook it. 
  11. There usually isn't connection points on 木耳 but check and 
    This is the back of  the 雲耳
    cut away if necessary. Then cut into similar size as the 雲耳.
  12. Heat a wok to medium heat, once it's warm add the oil, onion and garlic.
  13. Once you smell the mixture cooking, add the chayote slices. Stir and let it cook at medium heat.
  14. After 2-3 mins, add in the slice pork. Cook and stir. To speed up cooking time, cover for a bit in-between stir.
  15. When the pork is about 80% cooked, add in the 雲耳 and 木耳
  16. As usual, stir around to ensure it's getting cooked.
  17. Cover and cook for another 2 mins and cover again and let it cook until the pork is done.
  18. And you're good to go :)


Notes:
木耳 is firmer in texture where as 雲耳 can be softer.
Do not over cook either of them, especially 雲耳. It can be a bit slimy when overcooked so do not overcook it.
This is 木耳

Monday, 11 May 2015


Sorry it probably doesn't look the prettiest in the world but it's very tasty!!

Instead of just stuffing the tubes with only meat, I like to mix in Water Chestnuts.
It's a little bit more work but very worth while.
Water Chestnuts brings a nice sweetness to the dish as well as a nice crunch. The sweetness and the crunchy texture is what makes the dish so special.
Actually, the meat mixture I use can be cooked as a dish on it's own and this dish is actually a twist on that one. :)

If the meat is seasoned well, there's no need for a sauce. If you didn't have time to season the meat, then you can pour a little soy sauce or make a thicker sauce with soy or oyster cause and some corn starch.

The squid tubes I buy are already washed and cleaned but I always wash myself and double check to make sure the bone is not left behind. There's only 1 bone in the squid and it's quite easy to find and rip out if it is left behind.

Stuff Squid Tubes with Pork and Water Chestnuts

Makes 6 tubes Prep Time: 15 mins Cook Time: 15 mins

Ingredients

  • 1 Package of squid tubes, about 6 tubes in the package.
  • 200g of minced pork
  • 4-5 water chestnuts
  • 1/2 tsp soy sauce
  • 1/2 tsp sugar
  • 1/2 tsp ground white pepper (optional)

Directions

  1. Mix the soy sauce, sugar and white pepper into the minced pork and let it sit and marinate.
  2. Peel the water chestnuts with a knife and then mince. The volume of the chestnut should be less then the volume of pork. So start off with 4 and see how much you have and add the 5th chestnut if required. All depends on the size of the water chestnut.
  3. Add to the pork and mix well.
  4. Wash the squid tubes and strain to dry.
  5. Stuff the pork and water chestnut mixture into the tube. Stuff about 3/4 full. The squid will shrink!! NOTE: Left over pork mixture can be pan fried to look like hamburger meat!! Very tasty on it's own.
  6. Place in a dish that can be used to steam.If you have time, leave the dish alone a little longer so it can sit and marinate.
  7. Set up your steaming equipment and heat the water.
  8. Once the water is boiling, place the plate in place for the dish to be steamed.
  9. It should only take about 15 mins. After 10 mins, check on how the dish looks, you can even us a meat thermometer to poke the middle to check temperature of the meat.

Once it's cooked you're done and ready to eat :)
If you didn't have time to let it marinate or you didn't use pre-marinated mince pork, then you might want to add a bit of soy sauce or make that oyster sauce.
The flavour will come from the meat and the water chestnut!

Variation

Instead of using Water chestnut, use Lotus Root. It also has a sweetness like water chestnut but it's less crunchy. Volume wise, I like to use the same volume of minced Lotus Root as pork so it's 1:1 volume wise.

Monday, 11 May 2015 Agg

Sorry it probably doesn't look the prettiest in the world but it's very tasty!!

Instead of just stuffing the tubes with only meat, I like to mix in Water Chestnuts.
It's a little bit more work but very worth while.
Water Chestnuts brings a nice sweetness to the dish as well as a nice crunch. The sweetness and the crunchy texture is what makes the dish so special.
Actually, the meat mixture I use can be cooked as a dish on it's own and this dish is actually a twist on that one. :)

If the meat is seasoned well, there's no need for a sauce. If you didn't have time to season the meat, then you can pour a little soy sauce or make a thicker sauce with soy or oyster cause and some corn starch.

The squid tubes I buy are already washed and cleaned but I always wash myself and double check to make sure the bone is not left behind. There's only 1 bone in the squid and it's quite easy to find and rip out if it is left behind.

Stuff Squid Tubes with Pork and Water Chestnuts

Makes 6 tubes Prep Time: 15 mins Cook Time: 15 mins

Ingredients

  • 1 Package of squid tubes, about 6 tubes in the package.
  • 200g of minced pork
  • 4-5 water chestnuts
  • 1/2 tsp soy sauce
  • 1/2 tsp sugar
  • 1/2 tsp ground white pepper (optional)

Directions

  1. Mix the soy sauce, sugar and white pepper into the minced pork and let it sit and marinate.
  2. Peel the water chestnuts with a knife and then mince. The volume of the chestnut should be less then the volume of pork. So start off with 4 and see how much you have and add the 5th chestnut if required. All depends on the size of the water chestnut.
  3. Add to the pork and mix well.
  4. Wash the squid tubes and strain to dry.
  5. Stuff the pork and water chestnut mixture into the tube. Stuff about 3/4 full. The squid will shrink!! NOTE: Left over pork mixture can be pan fried to look like hamburger meat!! Very tasty on it's own.
  6. Place in a dish that can be used to steam.If you have time, leave the dish alone a little longer so it can sit and marinate.
  7. Set up your steaming equipment and heat the water.
  8. Once the water is boiling, place the plate in place for the dish to be steamed.
  9. It should only take about 15 mins. After 10 mins, check on how the dish looks, you can even us a meat thermometer to poke the middle to check temperature of the meat.

Once it's cooked you're done and ready to eat :)
If you didn't have time to let it marinate or you didn't use pre-marinated mince pork, then you might want to add a bit of soy sauce or make that oyster sauce.
The flavour will come from the meat and the water chestnut!

Variation

Instead of using Water chestnut, use Lotus Root. It also has a sweetness like water chestnut but it's less crunchy. Volume wise, I like to use the same volume of minced Lotus Root as pork so it's 1:1 volume wise.

Sunday, 26 April 2015


You don't normally see pork bone congee in the menu at congee restaurant because this is one of the ingredients you should cook with the congee from the start for the flavours to really meld together.

You might ask, "why use pork bone instead of just the meat?" The reason why I used pork bone is because there's a certain sweetness that comes from pork bone when you make soup or congee. You can definitely use meat in your congee instead of pork bone, but that's another type of congee that I will post about at an other time.
Different flavours and different styles.

I cooked this for 30 mins to ensure that the flavours is mixed nicely into the congee.
I also pre-treated the pork bone when I first brought it before I froze them in the freezer so I can use it at any time. For the pre-treatment, I quickly blanched the bones. Then washed it under cold water with a brush to brush off any impurities. Once cooled and dried, I bagged them and stuffed them in the freezer to be used in soup/congee.

This will cook a very big pot that can feed up to 5 people.

Pork Bone Congee with Dried Bean Curd

Makes 1 big pot Prep Time: Overnight Cook Time: 40 mins

Ingredients


  • 1000g Pork Bone
  • 3 to 3.5L of water
  • 1.5 rice cooker cup of frozen rice
  • 85g (1/2 bag) dried Bean Curd (picture to the left)
  • 2 tsp salt

Directions

  1. Put 3L of water into the pot and boil.
  2. Add in the pork bone, bring it back up to a boil.
  3. Rinse the Bean Curd and put the Bean Curd and the rice into the pot of boiling water.
  4. Stir and bring back to a boil.
  5. Turn the heat to simmer and leave it alone for 20 mins.
  6. Check on the thickness and add more water if needed.
  7. Add salt and stir and cook for another 10 mins for 30 mins in total.
If you added water, you'll have to turn up the heat again.

And you're done :)

The congee will continue to thicken after you cooked it and it's cooling!!!
I used 3.5L of water, when I first started eating it, it was still a bit watery. By the time I was on my last bowl, it was at a thickness I prefer.
So if you start off with 3L of water and you have left overs, you might need to add more water the next time you eat it.

Sunday, 26 April 2015 Agg


You don't normally see pork bone congee in the menu at congee restaurant because this is one of the ingredients you should cook with the congee from the start for the flavours to really meld together.

You might ask, "why use pork bone instead of just the meat?" The reason why I used pork bone is because there's a certain sweetness that comes from pork bone when you make soup or congee. You can definitely use meat in your congee instead of pork bone, but that's another type of congee that I will post about at an other time.
Different flavours and different styles.

I cooked this for 30 mins to ensure that the flavours is mixed nicely into the congee.
I also pre-treated the pork bone when I first brought it before I froze them in the freezer so I can use it at any time. For the pre-treatment, I quickly blanched the bones. Then washed it under cold water with a brush to brush off any impurities. Once cooled and dried, I bagged them and stuffed them in the freezer to be used in soup/congee.

This will cook a very big pot that can feed up to 5 people.

Pork Bone Congee with Dried Bean Curd

Makes 1 big pot Prep Time: Overnight Cook Time: 40 mins

Ingredients


  • 1000g Pork Bone
  • 3 to 3.5L of water
  • 1.5 rice cooker cup of frozen rice
  • 85g (1/2 bag) dried Bean Curd (picture to the left)
  • 2 tsp salt

Directions

  1. Put 3L of water into the pot and boil.
  2. Add in the pork bone, bring it back up to a boil.
  3. Rinse the Bean Curd and put the Bean Curd and the rice into the pot of boiling water.
  4. Stir and bring back to a boil.
  5. Turn the heat to simmer and leave it alone for 20 mins.
  6. Check on the thickness and add more water if needed.
  7. Add salt and stir and cook for another 10 mins for 30 mins in total.
If you added water, you'll have to turn up the heat again.

And you're done :)

The congee will continue to thicken after you cooked it and it's cooling!!!
I used 3.5L of water, when I first started eating it, it was still a bit watery. By the time I was on my last bowl, it was at a thickness I prefer.
So if you start off with 3L of water and you have left overs, you might need to add more water the next time you eat it.

Saturday, 21 March 2015


This is a super easy to make fried rice. Usually done in 15 mins, about the time it takes to cook the sausage. I like to use sweet sausages for this particular recipe but honestly you can use any meat when you make fried rice. I just find sweet sausage to be very easy to use as it's full of flavour so there's less things you need to do when you need to cook something fast.

Trick to cooking good fried rice is using day old rice. After the rice has been cooked and been in the fridge for a day, it's at a good dry level that makes it perfect for fried rice.

Quick and Easy Fried Rice with Sausage

Makes about 7 bowls of rice Prep time: 10 mins cook time: 10 mins

Ingredients

  • cooked rice - 3 rice cooker cups when uncooked rice
  • 400g of Sausage (I use Chinese Red Sausage or Sweet Longaniza)
  • 2-3 Green Onions
  • 2 Eggs
  • Soy Sauce
  • 1 tsp minced garlic
  • 1/2 tbsp oil

Directions

  1. Start to heat up the pan
  2. While the wok is heating, cut the sausage into bite size pieces.
  3. The pan should be hot by the time you're done cutting, add the oil and the garlic to the wok. Then add the sausage you just cut up.
  4. While the sausage is cooking, dice up the green onion
  5. Stir the sausage around so it cooks evenly and scramble the eggs in a bowl.
  6. When the sausage is done cooking, mix in the rice and stir around. The rice will change colour due to the sausage. Add a touch of Soy Sauce. I usually pour straight from the bottle and make a circle around the pan.
  7. Once it's well mixed and the rice is all warmed up, mix in the green onion.
  8. Make a hole in the middle and pour in the scrambled egg.
  9. Let it cook a little bit before mixing the rice into egg

And you're done :)

Simple, fast and tasty.


Saturday, 21 March 2015 Agg


This is a super easy to make fried rice. Usually done in 15 mins, about the time it takes to cook the sausage. I like to use sweet sausages for this particular recipe but honestly you can use any meat when you make fried rice. I just find sweet sausage to be very easy to use as it's full of flavour so there's less things you need to do when you need to cook something fast.

Trick to cooking good fried rice is using day old rice. After the rice has been cooked and been in the fridge for a day, it's at a good dry level that makes it perfect for fried rice.

Quick and Easy Fried Rice with Sausage

Makes about 7 bowls of rice Prep time: 10 mins cook time: 10 mins

Ingredients

  • cooked rice - 3 rice cooker cups when uncooked rice
  • 400g of Sausage (I use Chinese Red Sausage or Sweet Longaniza)
  • 2-3 Green Onions
  • 2 Eggs
  • Soy Sauce
  • 1 tsp minced garlic
  • 1/2 tbsp oil

Directions

  1. Start to heat up the pan
  2. While the wok is heating, cut the sausage into bite size pieces.
  3. The pan should be hot by the time you're done cutting, add the oil and the garlic to the wok. Then add the sausage you just cut up.
  4. While the sausage is cooking, dice up the green onion
  5. Stir the sausage around so it cooks evenly and scramble the eggs in a bowl.
  6. When the sausage is done cooking, mix in the rice and stir around. The rice will change colour due to the sausage. Add a touch of Soy Sauce. I usually pour straight from the bottle and make a circle around the pan.
  7. Once it's well mixed and the rice is all warmed up, mix in the green onion.
  8. Make a hole in the middle and pour in the scrambled egg.
  9. Let it cook a little bit before mixing the rice into egg

And you're done :)

Simple, fast and tasty.


Monday, 2 March 2015


In this dish, the pork and shrimp mixture nicely contrasts the softness of the tofu creating a very nice feel in your mouth when you eat it.
It's not too complicated to make as long as you have minced pork on hand as the shrimp can be minced up quite fast.
Any pork and shrimp left over can be cooked on it's own in a "meat ball" which is quite tasty on it's own.
The shrimp is actually the star of the dish while the pork is used as a binding agent for the pork since it's not fully minced and needs help to stick together.

Steamed Tofu with Minced Shrimp and Pork

Makes 8 blocks Prep Time: 10 mins Cook Time: 10-15mins

Ingredients

Main:
  • ~50g  of Minced Pork
  • 100g Shrimp (peeled and shelled)
  • 1 package soft or silky Tofu (Other Tofu like all-purpose or firmer ones are fine too but in a steam dish, you can use more delicate tofu)
  • 1 tsp Soy Sauce
  • 1 tsp Sugar
Sauce - Optional:
  • 1/2 Tbsp Oyster sauce
  • 1 tsp Sugar
  • 1/2 Tbsp Corn Starch
  • 1/3 cup water

Directions

  1. On a cutting board, start chopping up the shrimp and mince the shrimp. It does not have to be finely minced, you can have some bigger pieces but you'll want to have at least 1/2 to 3/4 shrimp in a nice paste
  2. Mix with the mince pork. Use just enough to help bind the shrimp together, you may not need to use all 100g. I personally like more shrimp then pork
  3. Add soy sauce and sugar and mix
  4. Open the package of tofu and very carefully rinse the tofu water off.
  5. Cut the tofu into enough pieces to fit your steam dish. I'm able to fit 10 pieces before I run out of room.
  6. Put all the tofu pieces onto the dish and lightly score the top with a hash pattern.
  7. Put a spoon of the pork and shrimp mixture on top of each tofu piece. (picture to the right)
  8. Cover the dish with saran wrap and steam for 10-15 mins.
  9. Keep an eye on the meat, the pork will be the longest thing to cook so depending on how much pork you used, the cooking time can vary.
  10. Once it's done steaming, you'll still find a considerable amount of water in the dish, try pouring as much out as possible.

The dish is basically ready but if you find it too bland because the tofu is bland, either make the sauce or just add fish soy sauce to the dish.

  1. If you want to make the sauce, in a small bowl, mix together all the ingredients for the sauce.
  2. Heat it up in a skillet until a boil.
  3. Cook until the sauce is at the right thickness to your liking.
  4. Remove from heat and pour on top of the tofu.
Monday, 2 March 2015 Agg

In this dish, the pork and shrimp mixture nicely contrasts the softness of the tofu creating a very nice feel in your mouth when you eat it.
It's not too complicated to make as long as you have minced pork on hand as the shrimp can be minced up quite fast.
Any pork and shrimp left over can be cooked on it's own in a "meat ball" which is quite tasty on it's own.
The shrimp is actually the star of the dish while the pork is used as a binding agent for the pork since it's not fully minced and needs help to stick together.

Steamed Tofu with Minced Shrimp and Pork

Makes 8 blocks Prep Time: 10 mins Cook Time: 10-15mins

Ingredients

Main:
  • ~50g  of Minced Pork
  • 100g Shrimp (peeled and shelled)
  • 1 package soft or silky Tofu (Other Tofu like all-purpose or firmer ones are fine too but in a steam dish, you can use more delicate tofu)
  • 1 tsp Soy Sauce
  • 1 tsp Sugar
Sauce - Optional:
  • 1/2 Tbsp Oyster sauce
  • 1 tsp Sugar
  • 1/2 Tbsp Corn Starch
  • 1/3 cup water

Directions

  1. On a cutting board, start chopping up the shrimp and mince the shrimp. It does not have to be finely minced, you can have some bigger pieces but you'll want to have at least 1/2 to 3/4 shrimp in a nice paste
  2. Mix with the mince pork. Use just enough to help bind the shrimp together, you may not need to use all 100g. I personally like more shrimp then pork
  3. Add soy sauce and sugar and mix
  4. Open the package of tofu and very carefully rinse the tofu water off.
  5. Cut the tofu into enough pieces to fit your steam dish. I'm able to fit 10 pieces before I run out of room.
  6. Put all the tofu pieces onto the dish and lightly score the top with a hash pattern.
  7. Put a spoon of the pork and shrimp mixture on top of each tofu piece. (picture to the right)
  8. Cover the dish with saran wrap and steam for 10-15 mins.
  9. Keep an eye on the meat, the pork will be the longest thing to cook so depending on how much pork you used, the cooking time can vary.
  10. Once it's done steaming, you'll still find a considerable amount of water in the dish, try pouring as much out as possible.

The dish is basically ready but if you find it too bland because the tofu is bland, either make the sauce or just add fish soy sauce to the dish.

  1. If you want to make the sauce, in a small bowl, mix together all the ingredients for the sauce.
  2. Heat it up in a skillet until a boil.
  3. Cook until the sauce is at the right thickness to your liking.
  4. Remove from heat and pour on top of the tofu.

Monday, 11 August 2014

These ribs are one of my favourites to make.
I love Maple Syrup. Ever since I got real maple syrup and tried cooking with it, I've been addicted to cooking with it. It's so good. I love it for my pancakes, but cooking with it adds a nice depth to your food.

This is definitely a fusion type dish since maple syrup is mainly from North America :)

Maple Miso Spare Ribs

Makes: 1 Plate Prep Time: 15 mins Cook Time: 10 mins

Ingredients

  • 1 lbs spare ribs (cut per rib)
  • 1/2 tsp soy sauce
  • 1 tsp sugar
  • 1 tsp corn starch
  • 1 heaping tsp Miso
  • 2 cloves garlic - minced
  • mirin or other type of rice wine to deglaze (optional)
  • 1 to 2 tbsp maple syrup

Directions

  1. Wash your spare ribs to help get rid of chipped bones and then cut them per rib.
  2. Marinate it with the soy sauce, sugar and corn starch for a minimum of 10 mins. The longer the more flavour your meat will have.
  3. Mince your garlic
  4. Heat your pan. Once it's hot, add oil and add the garlic and miso. Quickly stir.
  5. Add the spare ribs and mix well. Keep stirring so your meat doesn't burn.
  6. Add a little bit of water and cover to cook.
  7. Check and stir your ribs every several minutes. Add more water if required, don't have to add too much, just a little to help the miso dissolve and to keep meat from sticking to pan.
  8. Once your meat is ready, add a splash of mirin to deglaze the pan. Stir things around.
  9. Turn off heat and add the maple syrup. I like to have all my ribs coated with maple syrup.
And you're done :)

Miso: It doesn't matter what type of miso you use. I find the taste is relatively the same between yellow and red miso. I don't find much of a difference between Korean and Japanese miso either.

Tip: you do not need a lot of soy sauce in this dish because the soy flavour really comes from the miso itself.
Also the Miso may be salty so do not add too much of both or your dish will be salty.
Balance it out with more sugar.

Monday, 11 August 2014 Agg
These ribs are one of my favourites to make.
I love Maple Syrup. Ever since I got real maple syrup and tried cooking with it, I've been addicted to cooking with it. It's so good. I love it for my pancakes, but cooking with it adds a nice depth to your food.

This is definitely a fusion type dish since maple syrup is mainly from North America :)

Maple Miso Spare Ribs

Makes: 1 Plate Prep Time: 15 mins Cook Time: 10 mins

Ingredients

  • 1 lbs spare ribs (cut per rib)
  • 1/2 tsp soy sauce
  • 1 tsp sugar
  • 1 tsp corn starch
  • 1 heaping tsp Miso
  • 2 cloves garlic - minced
  • mirin or other type of rice wine to deglaze (optional)
  • 1 to 2 tbsp maple syrup

Directions

  1. Wash your spare ribs to help get rid of chipped bones and then cut them per rib.
  2. Marinate it with the soy sauce, sugar and corn starch for a minimum of 10 mins. The longer the more flavour your meat will have.
  3. Mince your garlic
  4. Heat your pan. Once it's hot, add oil and add the garlic and miso. Quickly stir.
  5. Add the spare ribs and mix well. Keep stirring so your meat doesn't burn.
  6. Add a little bit of water and cover to cook.
  7. Check and stir your ribs every several minutes. Add more water if required, don't have to add too much, just a little to help the miso dissolve and to keep meat from sticking to pan.
  8. Once your meat is ready, add a splash of mirin to deglaze the pan. Stir things around.
  9. Turn off heat and add the maple syrup. I like to have all my ribs coated with maple syrup.
And you're done :)

Miso: It doesn't matter what type of miso you use. I find the taste is relatively the same between yellow and red miso. I don't find much of a difference between Korean and Japanese miso either.

Tip: you do not need a lot of soy sauce in this dish because the soy flavour really comes from the miso itself.
Also the Miso may be salty so do not add too much of both or your dish will be salty.
Balance it out with more sugar.

Sunday, 8 June 2014

This is a super easy pork spare rib dish to make. Great when you don't have time and you need to do other things. It's yummy and has a nice fruit sour taste that can help stimulate appetite.
If you have an electric steamer, you can leave it alone unmanned. You can do the same with the rice cooker method if you have a big enough rice cooker. I used my stove top steamer so I couldn't leave it completely unmanned but I can sit at the table and work on other things while it cooks.

I honestly don't use measuring spoons when I cook, but I can give estimate for how much of each sauce I use. Please use it as a guideline, it really depends on your taste if you want more or less.

Sour plum pork spare ribs

Makes 1 Plate Prep Time: 15 mins Cook Time: 20 mins

Ingredients

  • 2 lines of spare ribs
  • 2 Sour Plums
  • 1/2 tbsp full of ground bean sauce (full as it over the top and not flat top)
  • 1 tsp soy sauce
  • 1 tsp sugar
  • 1 tsp corn starch

Directions


  1. Add the ground bean sauce, Soy Sauce, sugar and corn starch to the plate/container you're going to use to steam the ribs and mix together.
  2. Take 2 plums out of the jar and add it to the plate. Squeeze the plum to break it apart. Mush the plum around and mix with the rest of the sauce.
  3. Wash the ribs and cut the ribs into individual blocks (1 hard bone per block, if there's no hard bone, make it about the same size as the others)
  4. Add the meat to the plate and mix with the sauce. Let it sit and marinate.
  5. Add water to your steamer and boil the water. Wait for it to get to a good boil and steam hard.
  6. Optional step, saran warp your plate so you avoid too much water in your dish.
  7. Place your plate into the steamer.
  8. Steam for 20 mins and check if the meat is all cooked. It really depends on how big your plate is and if you had to stack the ribs together. If you didn't have to stack, it's most likely done. If you stacked, poke around to make sure
    it's all cooked.

Sunday, 8 June 2014 Agg
This is a super easy pork spare rib dish to make. Great when you don't have time and you need to do other things. It's yummy and has a nice fruit sour taste that can help stimulate appetite.
If you have an electric steamer, you can leave it alone unmanned. You can do the same with the rice cooker method if you have a big enough rice cooker. I used my stove top steamer so I couldn't leave it completely unmanned but I can sit at the table and work on other things while it cooks.

I honestly don't use measuring spoons when I cook, but I can give estimate for how much of each sauce I use. Please use it as a guideline, it really depends on your taste if you want more or less.

Sour plum pork spare ribs

Makes 1 Plate Prep Time: 15 mins Cook Time: 20 mins

Ingredients

  • 2 lines of spare ribs
  • 2 Sour Plums
  • 1/2 tbsp full of ground bean sauce (full as it over the top and not flat top)
  • 1 tsp soy sauce
  • 1 tsp sugar
  • 1 tsp corn starch

Directions


  1. Add the ground bean sauce, Soy Sauce, sugar and corn starch to the plate/container you're going to use to steam the ribs and mix together.
  2. Take 2 plums out of the jar and add it to the plate. Squeeze the plum to break it apart. Mush the plum around and mix with the rest of the sauce.
  3. Wash the ribs and cut the ribs into individual blocks (1 hard bone per block, if there's no hard bone, make it about the same size as the others)
  4. Add the meat to the plate and mix with the sauce. Let it sit and marinate.
  5. Add water to your steamer and boil the water. Wait for it to get to a good boil and steam hard.
  6. Optional step, saran warp your plate so you avoid too much water in your dish.
  7. Place your plate into the steamer.
  8. Steam for 20 mins and check if the meat is all cooked. It really depends on how big your plate is and if you had to stack the ribs together. If you didn't have to stack, it's most likely done. If you stacked, poke around to make sure
    it's all cooked.

Wednesday, 29 January 2014

Serving: 2-3 if it's the only dish
Cooking time <10 mins
Prep time <10 mins not including marinating time

As always, if possible, marinate the meat in soy sauce, sugar and corn starch for a min of 15 mins before cooking. If not possible, then as long as possible.
You do not have to finish all the cutting before you start cooking, that will shorten prep time as long as you can multitask :)

Ingredients
1 package of Firm /"Old" Tofu
300g Mince Pork
2 cloves of Garlic
a bit more then 1 tsp Ground Bean Sauce (If you use the tsp, don't scrap it flat, overload it)
1 tsp Chile Garlic Sauce
2 Green Onion, chopped

Thickening Agent - if required
- Water (just enough to dissolve the Corn Starch)
- 1 TSP Sugar
- Corn Starch (pending how much water is there in the wok)

The Sauces that are used: 


Directions
1. Heat the pan and add the oil and garlic when the pan is hot. Stir the garlic around.
2. Add the pork and stir.
3. While the pork is cooking, rinse the tofu and cut into cubes. Not to small because when you stir fry it, it might break smaller.
4. Add the Chili Garlic Sauce and the Ground Bean Sauce and mix.
5. Add the tofu when the pork is 80% cooked.
6. Since Tofu is technically cooked already, heat until it's warm and pork is 100% all cooked.
7. Check how much water is in your pan and if you want to get rid of it/thicken it. If I have a lot, I usually pour out a bit of the water to use to dissolve the corn starch and sugar. Pending on how much water I have, I use anywhere from 1 TSP to 1 TBSP of Corn Starch. Make a hole in the middle and pour in the solution and mix. The moment it bubbles mix in food with the sauce.
8. Add in green onion and mix
Done! :)

Tips:
Firm or "Old" Tofu is firmer and will not break as much when you cook!
Cut bigger pieces so when it breaks, it won't disintegrate into mush

Wednesday, 29 January 2014 Agg
Serving: 2-3 if it's the only dish
Cooking time <10 mins
Prep time <10 mins not including marinating time

As always, if possible, marinate the meat in soy sauce, sugar and corn starch for a min of 15 mins before cooking. If not possible, then as long as possible.
You do not have to finish all the cutting before you start cooking, that will shorten prep time as long as you can multitask :)

Ingredients
1 package of Firm /"Old" Tofu
300g Mince Pork
2 cloves of Garlic
a bit more then 1 tsp Ground Bean Sauce (If you use the tsp, don't scrap it flat, overload it)
1 tsp Chile Garlic Sauce
2 Green Onion, chopped

Thickening Agent - if required
- Water (just enough to dissolve the Corn Starch)
- 1 TSP Sugar
- Corn Starch (pending how much water is there in the wok)

The Sauces that are used: 


Directions
1. Heat the pan and add the oil and garlic when the pan is hot. Stir the garlic around.
2. Add the pork and stir.
3. While the pork is cooking, rinse the tofu and cut into cubes. Not to small because when you stir fry it, it might break smaller.
4. Add the Chili Garlic Sauce and the Ground Bean Sauce and mix.
5. Add the tofu when the pork is 80% cooked.
6. Since Tofu is technically cooked already, heat until it's warm and pork is 100% all cooked.
7. Check how much water is in your pan and if you want to get rid of it/thicken it. If I have a lot, I usually pour out a bit of the water to use to dissolve the corn starch and sugar. Pending on how much water I have, I use anywhere from 1 TSP to 1 TBSP of Corn Starch. Make a hole in the middle and pour in the solution and mix. The moment it bubbles mix in food with the sauce.
8. Add in green onion and mix
Done! :)

Tips:
Firm or "Old" Tofu is firmer and will not break as much when you cook!
Cut bigger pieces so when it breaks, it won't disintegrate into mush