Sunday, 26 October 2014

 Originally we were going to give 2 bottles of wine per person for wedding favours. One day my hubby had and idea and asked why don't we do cookies and wine. I wasn't too thrill with the idea since we already have all the wine but I figured we can drink it ourselves if we want to.
So I decided to make green tea heart shape cookies since it's a recipe I've done before.

The nice thing about these cookies is that it's freezable so you can make them well ahead of time. The most I've tried freezing these cookies before eating them is 1 month. Since I know 1 month will work great, that's how far ahead I made the cookies.


I saran wrapped pairs of cookies so I can easily put them into the favour bags the day before the wedding.
I got these pretty favour bags on the left from China.


I found filling the gun to be very time consuming. Even more time consuming then it is to make the cookies and squeeze out each cookie. Since I had to make 200 cookies, I had 2 cookie guns going. I would fill while my hubby would squeeze it out.

The heart shape from the Wilson cookie gun isn't as good as you can see from the picture on the left.
It looks a bit weird but the cookie gun is easy to use.


I borrowed the second cookie gun from my friend.
Her's is an Italian brand cookie gun. It's harder to use but the heart shapes turn out a lot better as seen in the picture on the right.

Overall, the product taste good so I cared less about the shape.

Match Honey Spritz Cookie

Ingredients

  • 1 Tbsp matcha
  • 180g non bleach all purpose flour
  • 1/2 tsp baking powder
  • 1/4 tsp salt
  • 113.5g butter
  • 50g sugar
  • 1 egg
  • 50g honey
  • 1/2 tsp vanilla

Directions

  1. Preheat oven to 350 degree F.
  2. In a bowl, mix together the matcha, flour, baking powder and salt. 
  3. In another bowl, cream the butter until fluffy using a stand mixer or a hand mixer. 
  4. Add the sugar, egg and vanilla to the butter and beat until evenly mixed and fluffy.
  5. Add the dry mixture to the ingredients and mix until the dry ingredients is just incorporated. The dough should look shaggy and somewhat fluffy.
  6. Check if the dough is too wet, if it is, add more flour.
  7. Load the dough into the cookie gun and press the dough onto a cold, ungreased cookie sheet.
  8. Bake for 8-12 minutes or until the cookies are lightly golden brown around the edges. Remove from heat and onto cooling grid.


Enjoy :)
Sunday, 26 October 2014 Agg
 Originally we were going to give 2 bottles of wine per person for wedding favours. One day my hubby had and idea and asked why don't we do cookies and wine. I wasn't too thrill with the idea since we already have all the wine but I figured we can drink it ourselves if we want to.
So I decided to make green tea heart shape cookies since it's a recipe I've done before.

The nice thing about these cookies is that it's freezable so you can make them well ahead of time. The most I've tried freezing these cookies before eating them is 1 month. Since I know 1 month will work great, that's how far ahead I made the cookies.


I saran wrapped pairs of cookies so I can easily put them into the favour bags the day before the wedding.
I got these pretty favour bags on the left from China.


I found filling the gun to be very time consuming. Even more time consuming then it is to make the cookies and squeeze out each cookie. Since I had to make 200 cookies, I had 2 cookie guns going. I would fill while my hubby would squeeze it out.

The heart shape from the Wilson cookie gun isn't as good as you can see from the picture on the left.
It looks a bit weird but the cookie gun is easy to use.


I borrowed the second cookie gun from my friend.
Her's is an Italian brand cookie gun. It's harder to use but the heart shapes turn out a lot better as seen in the picture on the right.

Overall, the product taste good so I cared less about the shape.

Match Honey Spritz Cookie

Ingredients

  • 1 Tbsp matcha
  • 180g non bleach all purpose flour
  • 1/2 tsp baking powder
  • 1/4 tsp salt
  • 113.5g butter
  • 50g sugar
  • 1 egg
  • 50g honey
  • 1/2 tsp vanilla

Directions

  1. Preheat oven to 350 degree F.
  2. In a bowl, mix together the matcha, flour, baking powder and salt. 
  3. In another bowl, cream the butter until fluffy using a stand mixer or a hand mixer. 
  4. Add the sugar, egg and vanilla to the butter and beat until evenly mixed and fluffy.
  5. Add the dry mixture to the ingredients and mix until the dry ingredients is just incorporated. The dough should look shaggy and somewhat fluffy.
  6. Check if the dough is too wet, if it is, add more flour.
  7. Load the dough into the cookie gun and press the dough onto a cold, ungreased cookie sheet.
  8. Bake for 8-12 minutes or until the cookies are lightly golden brown around the edges. Remove from heat and onto cooling grid.


Enjoy :)

Monday, 20 October 2014

It's been a while since I posted since I was crazy busy with moving and the wedding. But I finally did something I want to post about (besides my wedding cake, I'll do that when I get the official pictures)

This year we celebrated 4 birthdays at the same time as Thanksgiving. My husband, brother, niece and nephew are all born in October.
So what sort of cake do I make to celebrate 4 birthdays?
This year I went with cupcakes! Multiple for everyone.

Actually I was super excited this year to try out a new buttercream recipe.
I recently experimented with Swiss Buttercream and found out just how big of a difference methods contributes to the final product!
I used the exact same egg white:butter:sugar ratio as I normally do for my Italian Meringue Buttercream (minus the water because I don't need it anymore) and it was amazing!
It was every fluffier then normal!
I was so happy. This is now my new go to method.

Ratio-wise I'm still playing with it to see if I can decrease the butter and sugar a bit more to see if it'll get even fluffier.
I'll eventually settle on something I really like.
I also need to check if making my own butter helped too. That was also quite easy. Machine did all the work :)

Until then, here is the method I'm now using.

1. Mix sugar into the egg whites and whip over a double boiler set up.
2. Keep hand mixing until whites are 160 degrees F
3. Once it's at 160 degrees, remove from heat and mix in stand mixer Thick, glossy and cool. Can take up to 10 mins.**
4. Add in the whipped butter and mix until smooth. (if the butter is not pre-whipped, you can add it in little chunks at a time. I find with my stand mixer and pre-whipped butter I can drop in the entire thing)
5. Flavour accordingly

**Whipping time depends on the mixing stand you use!! I have a Bosch Universal Plus and it only takes about 3-5 mins to whip up on speed 4! I talked to the ladies at healthykitchens and they said with older Bosch machines you should use speed 3 and it takes about the same amount of time.
My friend uses a Kitchen Aid Stand mixer and it takes her about 10 mins. So please watch while it whips. I've tried whipping it for 10 mins before and nothing really changed too much, maybe a little less fluffy but at least it didn't collapse.

This time I made Strawberry and Lemon butter cream :) both were a hit.
I added a small fondant star for decoration on them just for cute factor


Have fun experimenting!

Monday, 20 October 2014 Agg
It's been a while since I posted since I was crazy busy with moving and the wedding. But I finally did something I want to post about (besides my wedding cake, I'll do that when I get the official pictures)

This year we celebrated 4 birthdays at the same time as Thanksgiving. My husband, brother, niece and nephew are all born in October.
So what sort of cake do I make to celebrate 4 birthdays?
This year I went with cupcakes! Multiple for everyone.

Actually I was super excited this year to try out a new buttercream recipe.
I recently experimented with Swiss Buttercream and found out just how big of a difference methods contributes to the final product!
I used the exact same egg white:butter:sugar ratio as I normally do for my Italian Meringue Buttercream (minus the water because I don't need it anymore) and it was amazing!
It was every fluffier then normal!
I was so happy. This is now my new go to method.

Ratio-wise I'm still playing with it to see if I can decrease the butter and sugar a bit more to see if it'll get even fluffier.
I'll eventually settle on something I really like.
I also need to check if making my own butter helped too. That was also quite easy. Machine did all the work :)

Until then, here is the method I'm now using.

1. Mix sugar into the egg whites and whip over a double boiler set up.
2. Keep hand mixing until whites are 160 degrees F
3. Once it's at 160 degrees, remove from heat and mix in stand mixer Thick, glossy and cool. Can take up to 10 mins.**
4. Add in the whipped butter and mix until smooth. (if the butter is not pre-whipped, you can add it in little chunks at a time. I find with my stand mixer and pre-whipped butter I can drop in the entire thing)
5. Flavour accordingly

**Whipping time depends on the mixing stand you use!! I have a Bosch Universal Plus and it only takes about 3-5 mins to whip up on speed 4! I talked to the ladies at healthykitchens and they said with older Bosch machines you should use speed 3 and it takes about the same amount of time.
My friend uses a Kitchen Aid Stand mixer and it takes her about 10 mins. So please watch while it whips. I've tried whipping it for 10 mins before and nothing really changed too much, maybe a little less fluffy but at least it didn't collapse.

This time I made Strawberry and Lemon butter cream :) both were a hit.
I added a small fondant star for decoration on them just for cute factor


Have fun experimenting!

Monday, 1 September 2014

At my parent's house we cook Chinese food every weekday. Since we have all the Chinese seasoning on hand, cooking Chinese food is the easy way out. On weekends my brother and I like to mix things up sometimes if we're not feeling lazy. Pizza surprisingly can be quite labour intensive depending on what type of ingredients you use.
If you use things like pepperoni, already cooked meats, pre-sliced veggie and shredded cheese, then it's super easy.

For this Pizza, I used homemade beer crust dough and Pesto sauce.
I'll eventually write separate posts for those items.

Pesto Chicken Beer Crust Pizza

Makes 1-12 inch pizza, Prep Time: 30 mins Cook Time: 20 - 40 mins

Ingredients

  • 300-500g Pizza Dough (Depends on crust thickness and size of pan)
  • 1 Chicken thigh meat (sliced and cooked)
  • half an onion sliced
  • 2 cloves of garlic
  • 3 Tbsp Pesto Sauce (a little more doesn't hurt)
  • 200g Mozzarella

Directions

  1. If you're making your own pizza dough, make it and let it sit for 30 mins while you prep the rest of your ingredients.
  2. While the dough is sitting, slice up the onions and dice up the garlic. Cook in a little bit of oil in a pan on medium heat to slowly caramelize the onion. Doesn't have to be fully caramelize when you use it for this pizza.
  3. Cut the chicken meat into small bite size piece. Add to the pan and cook the meat
  4. Let your toppings cool
  5. Pre-heat your oven to 400 degrees Fahrenheit (or to the max heat your pan allows, I like 400 as it makes my crust nice and crunchy)
  6. Grate your mozzarella
  7. Roll our your pizza to your prefer thickness. The one in the picture above was cracker like because I like my super thin crust pizza.
  8. Spread the pesto on the dough. Since this is pesto, cover even the the edges, your crust will taste awesome.
  9. Spread a thin layer of cheese
  10. Add the chicken, onion and garlic topping.
  11. Add the rest of the cheese
  12. Bake until the crust is brown and the cheese is all melted. Depending on thickness of your dough, can take anywhere from 20 mins to 45 hour. So keep an eye on it.

Not too complicated. :)

Monday, 1 September 2014 Agg
At my parent's house we cook Chinese food every weekday. Since we have all the Chinese seasoning on hand, cooking Chinese food is the easy way out. On weekends my brother and I like to mix things up sometimes if we're not feeling lazy. Pizza surprisingly can be quite labour intensive depending on what type of ingredients you use.
If you use things like pepperoni, already cooked meats, pre-sliced veggie and shredded cheese, then it's super easy.

For this Pizza, I used homemade beer crust dough and Pesto sauce.
I'll eventually write separate posts for those items.

Pesto Chicken Beer Crust Pizza

Makes 1-12 inch pizza, Prep Time: 30 mins Cook Time: 20 - 40 mins

Ingredients

  • 300-500g Pizza Dough (Depends on crust thickness and size of pan)
  • 1 Chicken thigh meat (sliced and cooked)
  • half an onion sliced
  • 2 cloves of garlic
  • 3 Tbsp Pesto Sauce (a little more doesn't hurt)
  • 200g Mozzarella

Directions

  1. If you're making your own pizza dough, make it and let it sit for 30 mins while you prep the rest of your ingredients.
  2. While the dough is sitting, slice up the onions and dice up the garlic. Cook in a little bit of oil in a pan on medium heat to slowly caramelize the onion. Doesn't have to be fully caramelize when you use it for this pizza.
  3. Cut the chicken meat into small bite size piece. Add to the pan and cook the meat
  4. Let your toppings cool
  5. Pre-heat your oven to 400 degrees Fahrenheit (or to the max heat your pan allows, I like 400 as it makes my crust nice and crunchy)
  6. Grate your mozzarella
  7. Roll our your pizza to your prefer thickness. The one in the picture above was cracker like because I like my super thin crust pizza.
  8. Spread the pesto on the dough. Since this is pesto, cover even the the edges, your crust will taste awesome.
  9. Spread a thin layer of cheese
  10. Add the chicken, onion and garlic topping.
  11. Add the rest of the cheese
  12. Bake until the crust is brown and the cheese is all melted. Depending on thickness of your dough, can take anywhere from 20 mins to 45 hour. So keep an eye on it.

Not too complicated. :)

Monday, 11 August 2014

These ribs are one of my favourites to make.
I love Maple Syrup. Ever since I got real maple syrup and tried cooking with it, I've been addicted to cooking with it. It's so good. I love it for my pancakes, but cooking with it adds a nice depth to your food.

This is definitely a fusion type dish since maple syrup is mainly from North America :)

Maple Miso Spare Ribs

Makes: 1 Plate Prep Time: 15 mins Cook Time: 10 mins

Ingredients

  • 1 lbs spare ribs (cut per rib)
  • 1/2 tsp soy sauce
  • 1 tsp sugar
  • 1 tsp corn starch
  • 1 heaping tsp Miso
  • 2 cloves garlic - minced
  • mirin or other type of rice wine to deglaze (optional)
  • 1 to 2 tbsp maple syrup

Directions

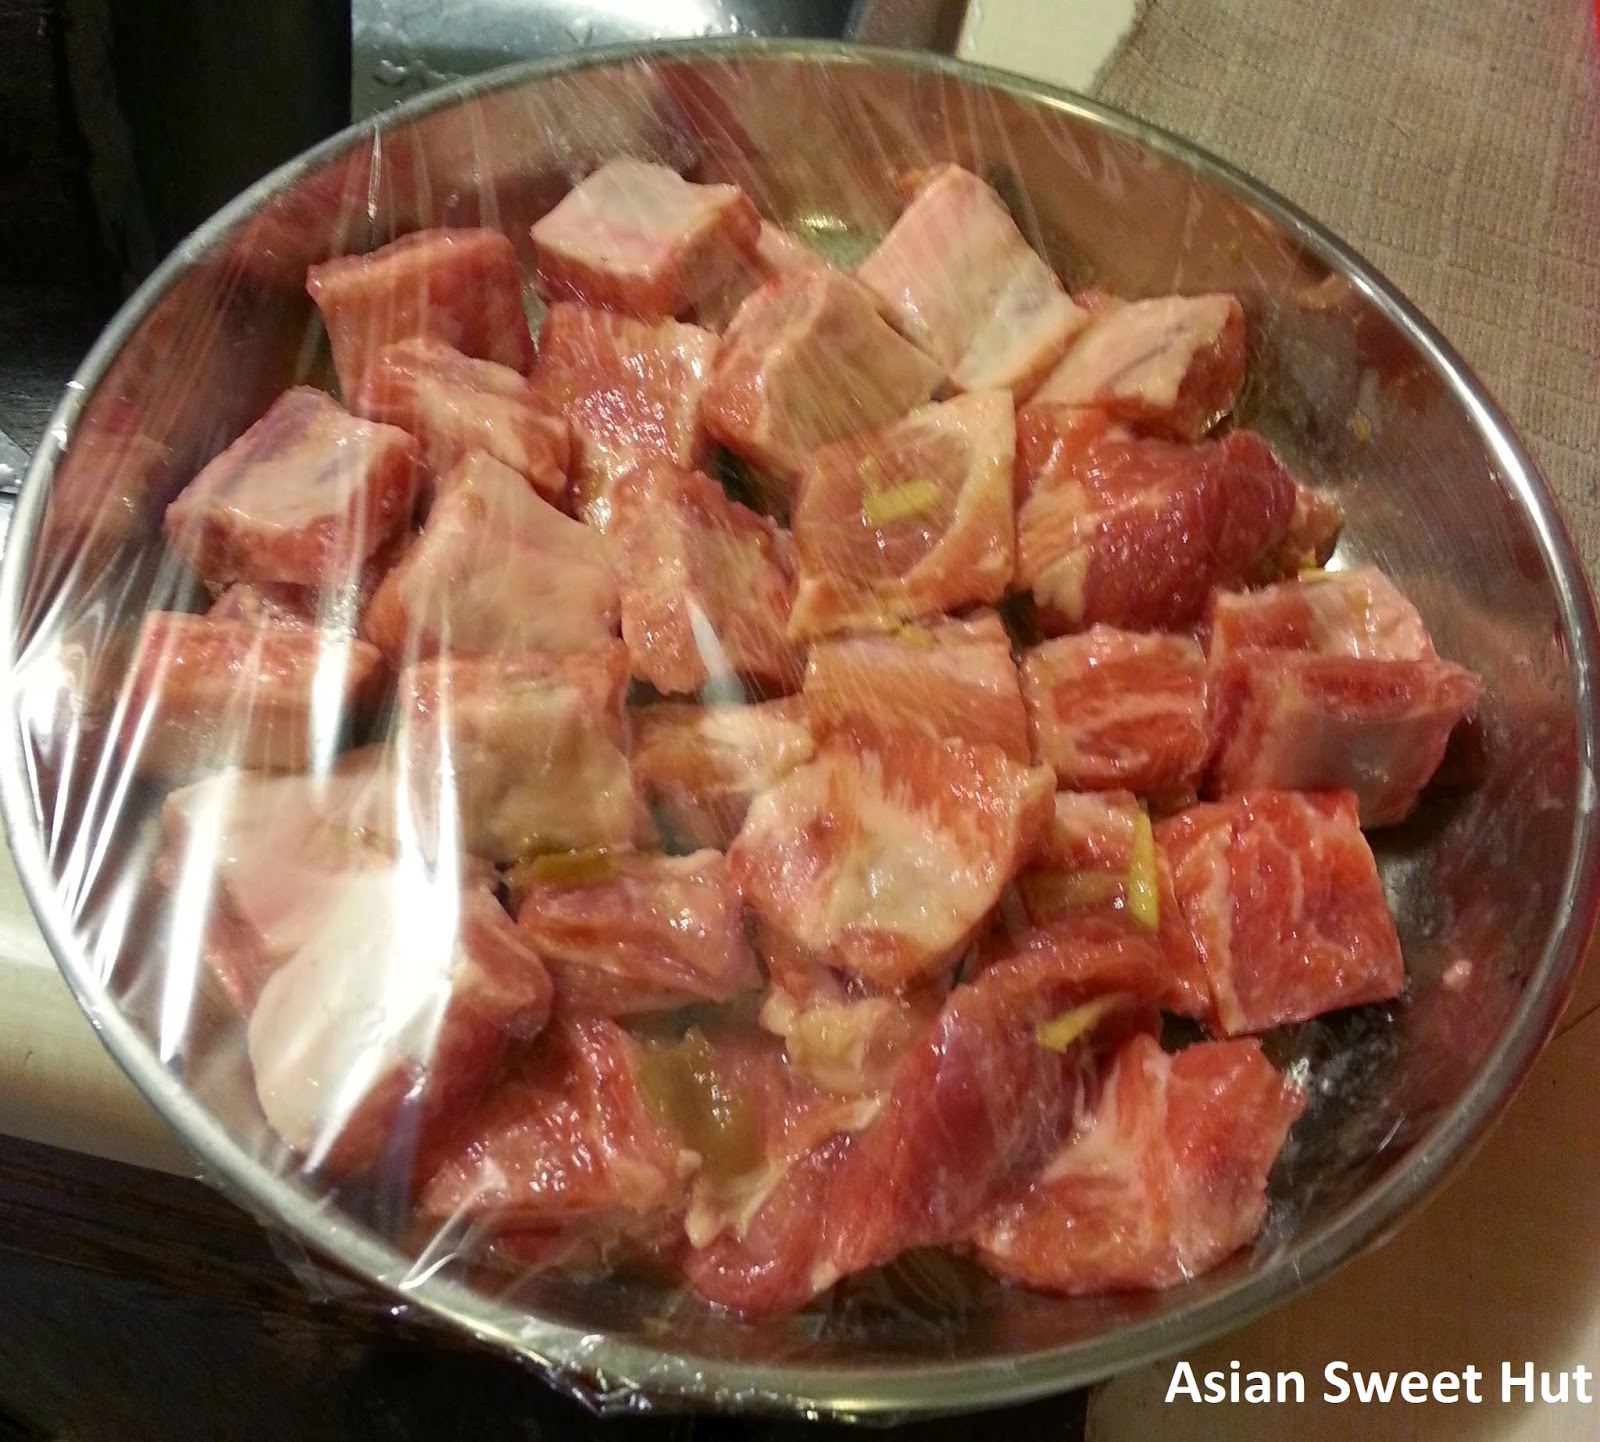
  1. Wash your spare ribs to help get rid of chipped bones and then cut them per rib.
  2. Marinate it with the soy sauce, sugar and corn starch for a minimum of 10 mins. The longer the more flavour your meat will have.
  3. Mince your garlic
  4. Heat your pan. Once it's hot, add oil and add the garlic and miso. Quickly stir.
  5. Add the spare ribs and mix well. Keep stirring so your meat doesn't burn.
  6. Add a little bit of water and cover to cook.
  7. Check and stir your ribs every several minutes. Add more water if required, don't have to add too much, just a little to help the miso dissolve and to keep meat from sticking to pan.
  8. Once your meat is ready, add a splash of mirin to deglaze the pan. Stir things around.
  9. Turn off heat and add the maple syrup. I like to have all my ribs coated with maple syrup.
And you're done :)

Miso: It doesn't matter what type of miso you use. I find the taste is relatively the same between yellow and red miso. I don't find much of a difference between Korean and Japanese miso either.

Tip: you do not need a lot of soy sauce in this dish because the soy flavour really comes from the miso itself.
Also the Miso may be salty so do not add too much of both or your dish will be salty.
Balance it out with more sugar.

Monday, 11 August 2014 Agg
These ribs are one of my favourites to make.
I love Maple Syrup. Ever since I got real maple syrup and tried cooking with it, I've been addicted to cooking with it. It's so good. I love it for my pancakes, but cooking with it adds a nice depth to your food.

This is definitely a fusion type dish since maple syrup is mainly from North America :)

Maple Miso Spare Ribs

Makes: 1 Plate Prep Time: 15 mins Cook Time: 10 mins

Ingredients

  • 1 lbs spare ribs (cut per rib)
  • 1/2 tsp soy sauce
  • 1 tsp sugar
  • 1 tsp corn starch
  • 1 heaping tsp Miso
  • 2 cloves garlic - minced
  • mirin or other type of rice wine to deglaze (optional)
  • 1 to 2 tbsp maple syrup

Directions

  1. Wash your spare ribs to help get rid of chipped bones and then cut them per rib.
  2. Marinate it with the soy sauce, sugar and corn starch for a minimum of 10 mins. The longer the more flavour your meat will have.
  3. Mince your garlic
  4. Heat your pan. Once it's hot, add oil and add the garlic and miso. Quickly stir.
  5. Add the spare ribs and mix well. Keep stirring so your meat doesn't burn.
  6. Add a little bit of water and cover to cook.
  7. Check and stir your ribs every several minutes. Add more water if required, don't have to add too much, just a little to help the miso dissolve and to keep meat from sticking to pan.
  8. Once your meat is ready, add a splash of mirin to deglaze the pan. Stir things around.
  9. Turn off heat and add the maple syrup. I like to have all my ribs coated with maple syrup.
And you're done :)

Miso: It doesn't matter what type of miso you use. I find the taste is relatively the same between yellow and red miso. I don't find much of a difference between Korean and Japanese miso either.

Tip: you do not need a lot of soy sauce in this dish because the soy flavour really comes from the miso itself.
Also the Miso may be salty so do not add too much of both or your dish will be salty.
Balance it out with more sugar.

Thursday, 17 July 2014

It's summer time and it's almost time to pick the July strawberries.
Strawberries are not only yummy but they make great decorations for your cakes!
You can make simple yet elegant designs all by slicing up strawberries and placing them in specific patterns.

The default shape of the strawberries are great to work with. Pick out the small and large strawberries and dedicate them for different roles. (large sharp ones for the base of the flower, smaller pieces go go in the middle etc)


This flower design is actually very easy. The only thing that took a lot of time was slicing up the strawberries.
The cake I baked in this post is the Almond Chiffon cake from the Cake Bible.
They're 9 inch in diameter and 2 in tall each.


I used Raspberry Greek Yogurt as the filling in-between.

Take your strawberries, wash them and pluck out the greens at the top.
Then slice up the strawberries vertically.
Once you have a good pile of various sizes, you can start assembly.

Use the bigger pieces with a pointy end first and lay them in a big ring. I centered mine so that it'll end up right in the middle.
Once you're done 1 ring, lay the next ring overlapped on the first one. Overlap them halfway on top of the first layer and put the new slice in the middle between the strawberries that are already there.
Keep on going until you're almost in the middle
With my 9 inch cake and the first layer about an inch in from the edge, I only needed 3 layers of strawberries before I started using smaller strawberries and standing them up.
For the middle, use smaller slices and slant the first batch. Keep on going and eventually your middle ones will stand up straight.
If you want, you can even use a whole strawberry in the middle with the pointy side up.


Since I had left over strawberry slices, I did the sides as well.
No need for any yogurt or cream to stick the strawberries.

Pretty and simple!
Enjoy your summer treat!!
Thursday, 17 July 2014 Agg
It's summer time and it's almost time to pick the July strawberries.
Strawberries are not only yummy but they make great decorations for your cakes!
You can make simple yet elegant designs all by slicing up strawberries and placing them in specific patterns.

The default shape of the strawberries are great to work with. Pick out the small and large strawberries and dedicate them for different roles. (large sharp ones for the base of the flower, smaller pieces go go in the middle etc)


This flower design is actually very easy. The only thing that took a lot of time was slicing up the strawberries.
The cake I baked in this post is the Almond Chiffon cake from the Cake Bible.
They're 9 inch in diameter and 2 in tall each.


I used Raspberry Greek Yogurt as the filling in-between.

Take your strawberries, wash them and pluck out the greens at the top.
Then slice up the strawberries vertically.
Once you have a good pile of various sizes, you can start assembly.

Use the bigger pieces with a pointy end first and lay them in a big ring. I centered mine so that it'll end up right in the middle.
Once you're done 1 ring, lay the next ring overlapped on the first one. Overlap them halfway on top of the first layer and put the new slice in the middle between the strawberries that are already there.
Keep on going until you're almost in the middle
With my 9 inch cake and the first layer about an inch in from the edge, I only needed 3 layers of strawberries before I started using smaller strawberries and standing them up.
For the middle, use smaller slices and slant the first batch. Keep on going and eventually your middle ones will stand up straight.
If you want, you can even use a whole strawberry in the middle with the pointy side up.


Since I had left over strawberry slices, I did the sides as well.
No need for any yogurt or cream to stick the strawberries.

Pretty and simple!
Enjoy your summer treat!!

Thursday, 10 July 2014

I'm so excited!!
I just got a new book as my birthday present. It's Rose Levy Beranbaum's "The Bread Bible".
I love her books. I have her 2 cake books and her pastry book. This adds nicely to my collection.

I had a chance to finally make bread over the weekend.
It was so good.
I tried the cheddar loaf and I was so happy with the flavour and the texture of the bread.
The cheddar flavour was really nice, I didn't have to add anything to the bread when I eat it as toast because it's so full of flavour already.

That pre-fermented sponge thing is really interesting. But I think my fridge is too cold for it because when I measure the temperature, it was below the temperature Rose noted it should be if you put it in the fridge.

I baked the bread on Sunday, today is Thursday and it's still soft.
So it seems to last as long as the Chinese soft white bread recipe that I had posted.
Only thing is that it used all purpose flour instead of bread flour. So that helped with the tenderness.

I'm going to slowly work my way through the book and do some experiments and adjustments along the way.
Once I get going with experiments and adjustments I'll be able to start posting recipes ;)


Thursday, 10 July 2014 Agg
I'm so excited!!
I just got a new book as my birthday present. It's Rose Levy Beranbaum's "The Bread Bible".
I love her books. I have her 2 cake books and her pastry book. This adds nicely to my collection.

I had a chance to finally make bread over the weekend.
It was so good.
I tried the cheddar loaf and I was so happy with the flavour and the texture of the bread.
The cheddar flavour was really nice, I didn't have to add anything to the bread when I eat it as toast because it's so full of flavour already.

That pre-fermented sponge thing is really interesting. But I think my fridge is too cold for it because when I measure the temperature, it was below the temperature Rose noted it should be if you put it in the fridge.

I baked the bread on Sunday, today is Thursday and it's still soft.
So it seems to last as long as the Chinese soft white bread recipe that I had posted.
Only thing is that it used all purpose flour instead of bread flour. So that helped with the tenderness.

I'm going to slowly work my way through the book and do some experiments and adjustments along the way.
Once I get going with experiments and adjustments I'll be able to start posting recipes ;)


Sunday, 8 June 2014

This is a super easy pork spare rib dish to make. Great when you don't have time and you need to do other things. It's yummy and has a nice fruit sour taste that can help stimulate appetite.
If you have an electric steamer, you can leave it alone unmanned. You can do the same with the rice cooker method if you have a big enough rice cooker. I used my stove top steamer so I couldn't leave it completely unmanned but I can sit at the table and work on other things while it cooks.

I honestly don't use measuring spoons when I cook, but I can give estimate for how much of each sauce I use. Please use it as a guideline, it really depends on your taste if you want more or less.

Sour plum pork spare ribs

Makes 1 Plate Prep Time: 15 mins Cook Time: 20 mins

Ingredients

  • 2 lines of spare ribs
  • 2 Sour Plums
  • 1/2 tbsp full of ground bean sauce (full as it over the top and not flat top)
  • 1 tsp soy sauce
  • 1 tsp sugar
  • 1 tsp corn starch

Directions


  1. Add the ground bean sauce, Soy Sauce, sugar and corn starch to the plate/container you're going to use to steam the ribs and mix together.
  2. Take 2 plums out of the jar and add it to the plate. Squeeze the plum to break it apart. Mush the plum around and mix with the rest of the sauce.
  3. Wash the ribs and cut the ribs into individual blocks (1 hard bone per block, if there's no hard bone, make it about the same size as the others)
  4. Add the meat to the plate and mix with the sauce. Let it sit and marinate.
  5. Add water to your steamer and boil the water. Wait for it to get to a good boil and steam hard.
  6. Optional step, saran warp your plate so you avoid too much water in your dish.
  7. Place your plate into the steamer.
  8. Steam for 20 mins and check if the meat is all cooked. It really depends on how big your plate is and if you had to stack the ribs together. If you didn't have to stack, it's most likely done. If you stacked, poke around to make sure
    it's all cooked.

Sunday, 8 June 2014 Agg
This is a super easy pork spare rib dish to make. Great when you don't have time and you need to do other things. It's yummy and has a nice fruit sour taste that can help stimulate appetite.
If you have an electric steamer, you can leave it alone unmanned. You can do the same with the rice cooker method if you have a big enough rice cooker. I used my stove top steamer so I couldn't leave it completely unmanned but I can sit at the table and work on other things while it cooks.

I honestly don't use measuring spoons when I cook, but I can give estimate for how much of each sauce I use. Please use it as a guideline, it really depends on your taste if you want more or less.

Sour plum pork spare ribs

Makes 1 Plate Prep Time: 15 mins Cook Time: 20 mins

Ingredients

  • 2 lines of spare ribs
  • 2 Sour Plums
  • 1/2 tbsp full of ground bean sauce (full as it over the top and not flat top)
  • 1 tsp soy sauce
  • 1 tsp sugar
  • 1 tsp corn starch

Directions


  1. Add the ground bean sauce, Soy Sauce, sugar and corn starch to the plate/container you're going to use to steam the ribs and mix together.
  2. Take 2 plums out of the jar and add it to the plate. Squeeze the plum to break it apart. Mush the plum around and mix with the rest of the sauce.
  3. Wash the ribs and cut the ribs into individual blocks (1 hard bone per block, if there's no hard bone, make it about the same size as the others)
  4. Add the meat to the plate and mix with the sauce. Let it sit and marinate.
  5. Add water to your steamer and boil the water. Wait for it to get to a good boil and steam hard.
  6. Optional step, saran warp your plate so you avoid too much water in your dish.
  7. Place your plate into the steamer.
  8. Steam for 20 mins and check if the meat is all cooked. It really depends on how big your plate is and if you had to stack the ribs together. If you didn't have to stack, it's most likely done. If you stacked, poke around to make sure
    it's all cooked.