Sunday, 8 June 2014

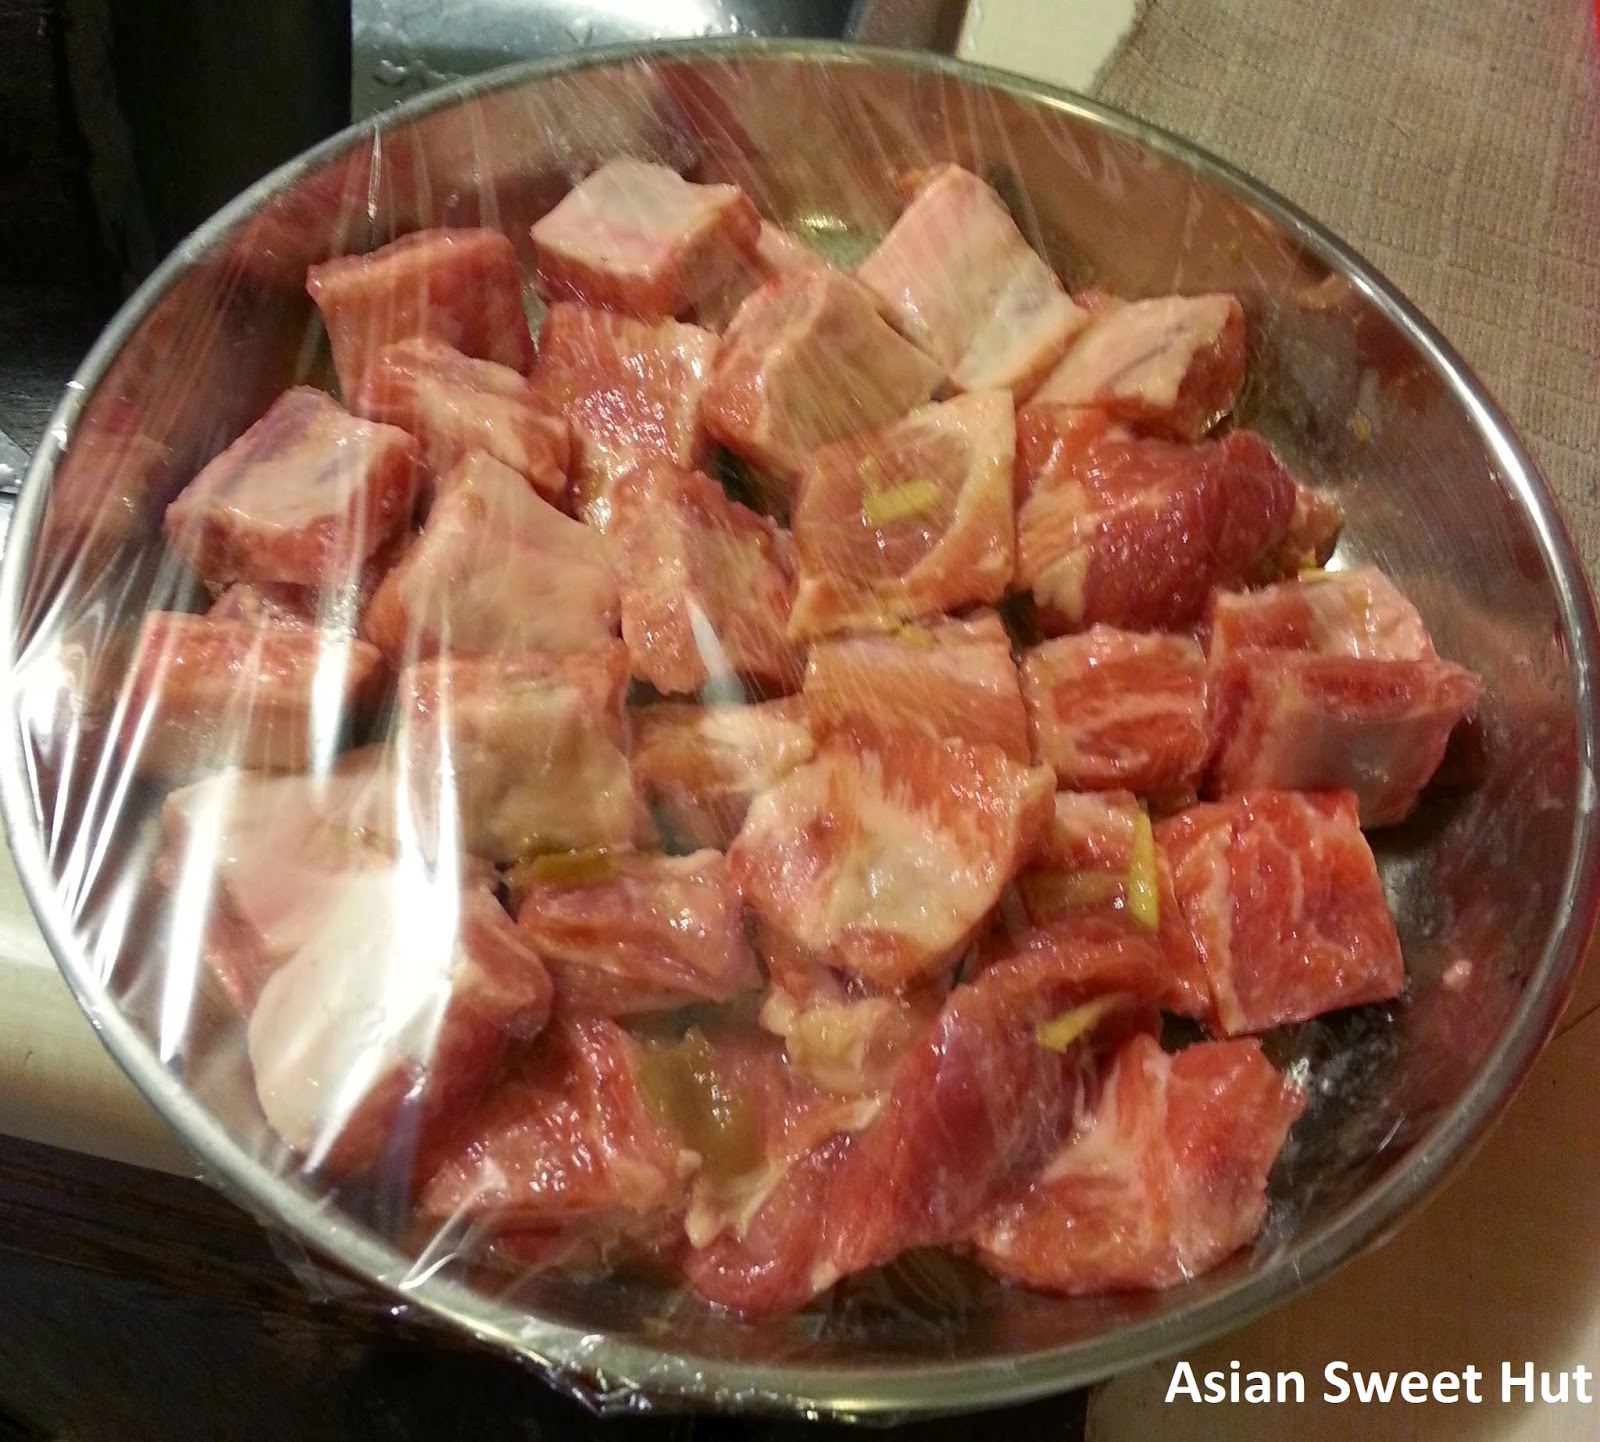
This is a super easy pork spare rib dish to make. Great when you don't have time and you need to do other things. It's yummy and has a nice fruit sour taste that can help stimulate appetite.
If you have an electric steamer, you can leave it alone unmanned. You can do the same with the rice cooker method if you have a big enough rice cooker. I used my stove top steamer so I couldn't leave it completely unmanned but I can sit at the table and work on other things while it cooks.

I honestly don't use measuring spoons when I cook, but I can give estimate for how much of each sauce I use. Please use it as a guideline, it really depends on your taste if you want more or less.

Sour plum pork spare ribs

Makes 1 Plate Prep Time: 15 mins Cook Time: 20 mins

Ingredients

  • 2 lines of spare ribs
  • 2 Sour Plums
  • 1/2 tbsp full of ground bean sauce (full as it over the top and not flat top)
  • 1 tsp soy sauce
  • 1 tsp sugar
  • 1 tsp corn starch

Directions


  1. Add the ground bean sauce, Soy Sauce, sugar and corn starch to the plate/container you're going to use to steam the ribs and mix together.
  2. Take 2 plums out of the jar and add it to the plate. Squeeze the plum to break it apart. Mush the plum around and mix with the rest of the sauce.
  3. Wash the ribs and cut the ribs into individual blocks (1 hard bone per block, if there's no hard bone, make it about the same size as the others)
  4. Add the meat to the plate and mix with the sauce. Let it sit and marinate.
  5. Add water to your steamer and boil the water. Wait for it to get to a good boil and steam hard.
  6. Optional step, saran warp your plate so you avoid too much water in your dish.
  7. Place your plate into the steamer.
  8. Steam for 20 mins and check if the meat is all cooked. It really depends on how big your plate is and if you had to stack the ribs together. If you didn't have to stack, it's most likely done. If you stacked, poke around to make sure
    it's all cooked.

Sunday, 8 June 2014 Agg
This is a super easy pork spare rib dish to make. Great when you don't have time and you need to do other things. It's yummy and has a nice fruit sour taste that can help stimulate appetite.
If you have an electric steamer, you can leave it alone unmanned. You can do the same with the rice cooker method if you have a big enough rice cooker. I used my stove top steamer so I couldn't leave it completely unmanned but I can sit at the table and work on other things while it cooks.

I honestly don't use measuring spoons when I cook, but I can give estimate for how much of each sauce I use. Please use it as a guideline, it really depends on your taste if you want more or less.

Sour plum pork spare ribs

Makes 1 Plate Prep Time: 15 mins Cook Time: 20 mins

Ingredients

  • 2 lines of spare ribs
  • 2 Sour Plums
  • 1/2 tbsp full of ground bean sauce (full as it over the top and not flat top)
  • 1 tsp soy sauce
  • 1 tsp sugar
  • 1 tsp corn starch

Directions


  1. Add the ground bean sauce, Soy Sauce, sugar and corn starch to the plate/container you're going to use to steam the ribs and mix together.
  2. Take 2 plums out of the jar and add it to the plate. Squeeze the plum to break it apart. Mush the plum around and mix with the rest of the sauce.
  3. Wash the ribs and cut the ribs into individual blocks (1 hard bone per block, if there's no hard bone, make it about the same size as the others)
  4. Add the meat to the plate and mix with the sauce. Let it sit and marinate.
  5. Add water to your steamer and boil the water. Wait for it to get to a good boil and steam hard.
  6. Optional step, saran warp your plate so you avoid too much water in your dish.
  7. Place your plate into the steamer.
  8. Steam for 20 mins and check if the meat is all cooked. It really depends on how big your plate is and if you had to stack the ribs together. If you didn't have to stack, it's most likely done. If you stacked, poke around to make sure
    it's all cooked.

Friday, 23 May 2014

So my brother picked me up from work the other day and when we were talking about what we're going to do on the weekend and what to buy at the grocery store, we somehow ended up at waffles.
Luckily, I was able to borrow my friend's waffle maker to satisfy our cravings.

This was the first time we made waffles at home and I wanted something very fluffy but crisp.
Looked up several recipes, made some adjustments and it was so yummy.


This base recipe makes 4 batches of the waffles in the waffle machine I used.


Buttermilk Waffle

Makes 8 Waffles, Prep Time 10 mins Cook Time 10 mins

Ingredients

  • 124g flour (Because I have unbleached all purpose flour, I did a half and half mix between that and cake flour)
  • 1 tbsp Brown Sugar
  • 1 tsp baking powder
  • 1/2 tsp baking soda
  • 1/4 tsp salt
  • 1 cup buttermilk
  • 16 g melted butter
  • 1 eggs (separated)
  • 1/2 tsp vanilla extract

Directions

  1. Mix the dry ingredients together.
  2. Separate the egg and add the yolk and vanilla into the buttermilk and mix.
  3. Whip the egg white to stiff peak.
  4. Add the dry ingredient to the buttermilk mixture and mix well.
  5. Fold in the egg whites using the whisk so you don't loose too much air.
  6. Use a 1/3 measuring cup to scoop the batter into the waffle iron.
  7. Follow waffle maker instruction and cook until it's golden brown
Tips: At first, I tried to pour the mixture into the waffle iron but I found that the batter either overflowed because I poured too much or there were holes because I couldn't spread it well enough at a fast rate.
Using the scoop allowed us to spread the batter better so it helped eliminate the holes.
Friday, 23 May 2014 Agg
So my brother picked me up from work the other day and when we were talking about what we're going to do on the weekend and what to buy at the grocery store, we somehow ended up at waffles.
Luckily, I was able to borrow my friend's waffle maker to satisfy our cravings.

This was the first time we made waffles at home and I wanted something very fluffy but crisp.
Looked up several recipes, made some adjustments and it was so yummy.


This base recipe makes 4 batches of the waffles in the waffle machine I used.


Buttermilk Waffle

Makes 8 Waffles, Prep Time 10 mins Cook Time 10 mins

Ingredients

  • 124g flour (Because I have unbleached all purpose flour, I did a half and half mix between that and cake flour)
  • 1 tbsp Brown Sugar
  • 1 tsp baking powder
  • 1/2 tsp baking soda
  • 1/4 tsp salt
  • 1 cup buttermilk
  • 16 g melted butter
  • 1 eggs (separated)
  • 1/2 tsp vanilla extract

Directions

  1. Mix the dry ingredients together.
  2. Separate the egg and add the yolk and vanilla into the buttermilk and mix.
  3. Whip the egg white to stiff peak.
  4. Add the dry ingredient to the buttermilk mixture and mix well.
  5. Fold in the egg whites using the whisk so you don't loose too much air.
  6. Use a 1/3 measuring cup to scoop the batter into the waffle iron.
  7. Follow waffle maker instruction and cook until it's golden brown
Tips: At first, I tried to pour the mixture into the waffle iron but I found that the batter either overflowed because I poured too much or there were holes because I couldn't spread it well enough at a fast rate.
Using the scoop allowed us to spread the batter better so it helped eliminate the holes.

Friday, 9 May 2014


My recipe is adopted from pain de mie. The original recipe is in Chinese, I had to get my mom to translate it for me. I modified the method and a little bit of the ingredients to suit my taste.

On the original website, she said to split the dough if it's too much for the pan but she didn't tell how to tell if it's too much...
So after some research, this is the measurement I decided to use: 900g for a 9x5x3in pan or 600g for a 8x4.5x2.5in pan.
So measure your pan before you bake to determine how much dough you'll need.  

One thing I found out when measuring, is that the width you see on the paper, is measured across the top and not the bottom since the bottom is more narrow and the top is wider.

This recipe adds up to slightly lower then 600g so I used a 8x4.5x2.5in pan since it was the closet pan size.


Soft White Loaf Bread

Ingredient

  • 300g bread flour
  • 4g instant yeast
  • 5g salt
  • 25g honey
  • 15g oil
  • 195g milk, i have 1% milk at home so this doesn't add a lot of fat (130g is 2/3 of the milk, measure this out first because you might not need all 195g. Depends on humidity)
  • 15g butter
  • This adds up to 559g

Directions

  1. Mix all the dry ingredients together.
  2. Add in honey, oil and 130g of the milk and mix well.
  3. Knead the dough and slowly add more milk as required. Even if you're not mixing it by hand, you should be able to see how well the dough is absorbing the milk to judge if you need more. Or you can always stop the machine and feel the dough.
  4. Knead until it is smooth and elastic. Best test I found was the window pane test.
  5. Knead in the butter
  6. Let it rise to about 2 times the size. When you press a finger in, it should spring back slowly. 
  7. Flip onto table and deflate. Then fold the left side 1/3 and right side over the folded side. Then do the same thing up and down.
  8. Flip around and cup the dough with palms facing you. Pull the bread into you. Do that on all 4 sides so in the end you'll have a round shape.
  9. Let it rest for 20-30 mins
  10. Press on it to degas, try to keep it in a circle
  11. Make a triangle shape by folder the right and left side towards the middle at a slant
  12. Start at the pointy end and roll towards you
  13. Once you finished rolling, tuck in the ends and put the dough edge side down into the pan.
  14. Let it rise to double to triple the size.
  15. Use the poke test to see how much longer does it need to rise. When you poke the dough, the indent is suppose to slowly come back and not to the full point. It should actually stay a bit indented. If it rises back right away, then you need to poof longer, if it doesn't rise back at all, it's overpoofed.
  16. Bake it at 375 degree F for 35 mins.


Tip: If your house is cold, turn on the oven light and put your bowl in there to let the bread rise. My house is 17-19 degrees C in the winter so I have to do this. It works quite well

The more I did research into bread making, the more scientific I found it. It can be easy if your oven, material etc matches nicely the recipe you find. If something varies, like temperature or material, it can become very complex to troubleshoot and adjust the recipe unless you understand the science behind making bread. 
But I find it very fun. After a several loaves, I think I finally have a good feel for my mixing machine and the proofing process.
So don't get discourage if the first time doesn't pan out for you. 
Friday, 9 May 2014 Agg

My recipe is adopted from pain de mie. The original recipe is in Chinese, I had to get my mom to translate it for me. I modified the method and a little bit of the ingredients to suit my taste.

On the original website, she said to split the dough if it's too much for the pan but she didn't tell how to tell if it's too much...
So after some research, this is the measurement I decided to use: 900g for a 9x5x3in pan or 600g for a 8x4.5x2.5in pan.
So measure your pan before you bake to determine how much dough you'll need.  

One thing I found out when measuring, is that the width you see on the paper, is measured across the top and not the bottom since the bottom is more narrow and the top is wider.

This recipe adds up to slightly lower then 600g so I used a 8x4.5x2.5in pan since it was the closet pan size.


Soft White Loaf Bread

Ingredient

  • 300g bread flour
  • 4g instant yeast
  • 5g salt
  • 25g honey
  • 15g oil
  • 195g milk, i have 1% milk at home so this doesn't add a lot of fat (130g is 2/3 of the milk, measure this out first because you might not need all 195g. Depends on humidity)
  • 15g butter
  • This adds up to 559g

Directions

  1. Mix all the dry ingredients together.
  2. Add in honey, oil and 130g of the milk and mix well.
  3. Knead the dough and slowly add more milk as required. Even if you're not mixing it by hand, you should be able to see how well the dough is absorbing the milk to judge if you need more. Or you can always stop the machine and feel the dough.
  4. Knead until it is smooth and elastic. Best test I found was the window pane test.
  5. Knead in the butter
  6. Let it rise to about 2 times the size. When you press a finger in, it should spring back slowly. 
  7. Flip onto table and deflate. Then fold the left side 1/3 and right side over the folded side. Then do the same thing up and down.
  8. Flip around and cup the dough with palms facing you. Pull the bread into you. Do that on all 4 sides so in the end you'll have a round shape.
  9. Let it rest for 20-30 mins
  10. Press on it to degas, try to keep it in a circle
  11. Make a triangle shape by folder the right and left side towards the middle at a slant
  12. Start at the pointy end and roll towards you
  13. Once you finished rolling, tuck in the ends and put the dough edge side down into the pan.
  14. Let it rise to double to triple the size.
  15. Use the poke test to see how much longer does it need to rise. When you poke the dough, the indent is suppose to slowly come back and not to the full point. It should actually stay a bit indented. If it rises back right away, then you need to poof longer, if it doesn't rise back at all, it's overpoofed.
  16. Bake it at 375 degree F for 35 mins.


Tip: If your house is cold, turn on the oven light and put your bowl in there to let the bread rise. My house is 17-19 degrees C in the winter so I have to do this. It works quite well

The more I did research into bread making, the more scientific I found it. It can be easy if your oven, material etc matches nicely the recipe you find. If something varies, like temperature or material, it can become very complex to troubleshoot and adjust the recipe unless you understand the science behind making bread. 
But I find it very fun. After a several loaves, I think I finally have a good feel for my mixing machine and the proofing process.
So don't get discourage if the first time doesn't pan out for you. 

Monday, 28 April 2014

Ah Spring. Time for new life, rain and allergies.
I am allergic to some pollen and dust. It hits me bad in the spring and fall.
I get stuffy nose and 10 years ago, there was no pill to address this.
They only had allergy pills to address runny nose, itchy eyes etc.

When they finally made pills that address stuffy nose as well, they were freaking huge and I hate pills :(
And I was so dependent on the pill it was horrible. If I miss taking it, I just suffered.
But since I hate pills, I avoided it and suffered for years.

So a couple years ago, my co-worker told me about neti pot. I looked it up, what it does sounds gross but I gave it a try and I was so happy I did.

Pills suppress the symptoms but never fixes it.
I found that the irrigation actually helps get rids of the symptoms rather then suppress it.
I found that over time, I actually didn't have to wash as much and still get by the day without really congesting.

However I still found the pot somewhat hard to use. When I'm super stuffed up, it just didn't work. The pot can be very frustrating and time consuming and it just turns me off from using it when that happens.
An other friend told me to try the squeeze bottle, but I was very skeptical about it. Finally when I had to get new pot, I decided to try the bottle and now I can say I'll never go back to the pot again.
The bottle is awesome. Maybe because you can control the water pressure and make it work even if it's super stuffed up, it's awesome.
I used it when I have a cold and for allergies to wash out bacteria and pollen/dust.

Please use boiled water and not water straight from tap. Apparently there are parasites in unboiled water that can potentially latch on to things inside your body (like your brain) when you do the wash so just to be safe, use boil water.
When i'm in maintenance mode, I don't have to wash twice a day. I can wash maybe once a day of every other day just to keep from getting a pollen and dust build up.
I'm also able to get away with half a packet of salt rather then a whole back when I'm in maintenance mode.

Yes it's a bit gross, but the relief you get is totally worth it. It's natural and actually helps solve the problem rather then just putting a band-aid on it.

Happy Spring :)
Monday, 28 April 2014 Agg
Ah Spring. Time for new life, rain and allergies.
I am allergic to some pollen and dust. It hits me bad in the spring and fall.
I get stuffy nose and 10 years ago, there was no pill to address this.
They only had allergy pills to address runny nose, itchy eyes etc.

When they finally made pills that address stuffy nose as well, they were freaking huge and I hate pills :(
And I was so dependent on the pill it was horrible. If I miss taking it, I just suffered.
But since I hate pills, I avoided it and suffered for years.

So a couple years ago, my co-worker told me about neti pot. I looked it up, what it does sounds gross but I gave it a try and I was so happy I did.

Pills suppress the symptoms but never fixes it.
I found that the irrigation actually helps get rids of the symptoms rather then suppress it.
I found that over time, I actually didn't have to wash as much and still get by the day without really congesting.

However I still found the pot somewhat hard to use. When I'm super stuffed up, it just didn't work. The pot can be very frustrating and time consuming and it just turns me off from using it when that happens.
An other friend told me to try the squeeze bottle, but I was very skeptical about it. Finally when I had to get new pot, I decided to try the bottle and now I can say I'll never go back to the pot again.
The bottle is awesome. Maybe because you can control the water pressure and make it work even if it's super stuffed up, it's awesome.
I used it when I have a cold and for allergies to wash out bacteria and pollen/dust.

Please use boiled water and not water straight from tap. Apparently there are parasites in unboiled water that can potentially latch on to things inside your body (like your brain) when you do the wash so just to be safe, use boil water.
When i'm in maintenance mode, I don't have to wash twice a day. I can wash maybe once a day of every other day just to keep from getting a pollen and dust build up.
I'm also able to get away with half a packet of salt rather then a whole back when I'm in maintenance mode.

Yes it's a bit gross, but the relief you get is totally worth it. It's natural and actually helps solve the problem rather then just putting a band-aid on it.

Happy Spring :)

Friday, 11 April 2014

Extra Virgin Olive Oil (EVOO) is not only good for salads, but it's actually good for your skin!

I only made this discovery a few years back and I wished I made it a long time ago to help my brother's skin problem.
He has eczema and seasonally, it gets really really bad. He's tried everything when he was a kid. The Dr recommended using Aveeno or the special prescribed cream we have to get at the pharmacy and honestly, none of them really worked. We found that he has to constantly put on the cream as he's dependent on the cream and if he forgets to put it on, it will show. The cream never heals his skin, just keeps it moisturize.

A couple of years ago when I was doing more research into natural skin products and do it yourself stuff, I started looking into Olive Oil and honey.
Someone used EVOO for a face mask and she found her skin became really nice and soft after.
Another masked she liked to do as aspirin mixed with honey. I tried both and found nice results after.
So that got me thinking where else can I use those 2 items and I did some further research.

The Greeks have used it in ancient times for multiple reasons including on skin and hair.
EVOO is high in anti-oxidant and it's anti-inflammatory.

So I experimented on my dry hands in the winter. Once I noticed it actually improves the quality of my skin, I tried it on my brother.
Within a week, his skin started looking better. It wasn't as dry and he only had to apply at night.

Then we tried propolis honey. The problem with propolis honey is that it's a bit sticky and in liquid format, it has alcohol content so it can sting if your skin is broken.
Due to the fact that it's a bit sticky, we only tried experiment at night after showers and before bed time so the skin had time to absorb before going to bed.
Propolis honey is anti-inflammatory, high in anti-oxidant and anti-bacterial.

We found that when we combined the 2, honey first and then olive oil after, his skin actually healed.
He can put it on every night, and his skin actually looked normal by the end of 2-3 weeks of using honey+EVOO. That was something creams were never able to do.

I highly recommend giving it a try during the dry season.
I put it on a couple nights a week during the winter season to help prevent my skin from becoming dry.
If you're doing this as a maintenance program, usually you don't need to use the honey. The olive oil will be enough.
If your skin is in a really bad state, I find the honey helps speeds up the healing.

The most common question people ask when I tell them I use EVOO on my skin is "isn't it oily?"
Well, yes it's oil, but if you use extra virgin, I find that your skin absorbs it rather fast so you would not get it all over the place.
It's natural and absorbs nicely.

There's a lot more research now into EVOO and Propolis honey since people have turned their attention to using natural items.
So if you want to look up what specific properties are in each that helps, it's easily available now on the internet.
I just wanted to share our experience and hope it helps others.

Cheers
Friday, 11 April 2014 Agg
Extra Virgin Olive Oil (EVOO) is not only good for salads, but it's actually good for your skin!

I only made this discovery a few years back and I wished I made it a long time ago to help my brother's skin problem.
He has eczema and seasonally, it gets really really bad. He's tried everything when he was a kid. The Dr recommended using Aveeno or the special prescribed cream we have to get at the pharmacy and honestly, none of them really worked. We found that he has to constantly put on the cream as he's dependent on the cream and if he forgets to put it on, it will show. The cream never heals his skin, just keeps it moisturize.

A couple of years ago when I was doing more research into natural skin products and do it yourself stuff, I started looking into Olive Oil and honey.
Someone used EVOO for a face mask and she found her skin became really nice and soft after.
Another masked she liked to do as aspirin mixed with honey. I tried both and found nice results after.
So that got me thinking where else can I use those 2 items and I did some further research.

The Greeks have used it in ancient times for multiple reasons including on skin and hair.
EVOO is high in anti-oxidant and it's anti-inflammatory.

So I experimented on my dry hands in the winter. Once I noticed it actually improves the quality of my skin, I tried it on my brother.
Within a week, his skin started looking better. It wasn't as dry and he only had to apply at night.

Then we tried propolis honey. The problem with propolis honey is that it's a bit sticky and in liquid format, it has alcohol content so it can sting if your skin is broken.
Due to the fact that it's a bit sticky, we only tried experiment at night after showers and before bed time so the skin had time to absorb before going to bed.
Propolis honey is anti-inflammatory, high in anti-oxidant and anti-bacterial.

We found that when we combined the 2, honey first and then olive oil after, his skin actually healed.
He can put it on every night, and his skin actually looked normal by the end of 2-3 weeks of using honey+EVOO. That was something creams were never able to do.

I highly recommend giving it a try during the dry season.
I put it on a couple nights a week during the winter season to help prevent my skin from becoming dry.
If you're doing this as a maintenance program, usually you don't need to use the honey. The olive oil will be enough.
If your skin is in a really bad state, I find the honey helps speeds up the healing.

The most common question people ask when I tell them I use EVOO on my skin is "isn't it oily?"
Well, yes it's oil, but if you use extra virgin, I find that your skin absorbs it rather fast so you would not get it all over the place.
It's natural and absorbs nicely.

There's a lot more research now into EVOO and Propolis honey since people have turned their attention to using natural items.
So if you want to look up what specific properties are in each that helps, it's easily available now on the internet.
I just wanted to share our experience and hope it helps others.

Cheers

Thursday, 3 April 2014

 So you might have seen this in the supermarket and wondered what are they and how do you eat it.
Some find dragon fruits tasteless but I find them sweet.
They're also very easy to eat.

Because the fruits are imported from far away from where I live, I find that most of the time the fruit is a bit bland. I suppose it's one of those fruits that don't hold it's flavour as well. Once in a while, I'll get lucky and get one with more flavour and sweetness.
Hopefully just because it's picked before it's ripe doesn't make it lose too much nutritional value.

So how to choose the fruit?
Look for a fruit without spots and is not too hard and not too soft.
Unless you live in a country that grows the fruit, chances are most of them are on the harder side because they pick the fruit before it's ripe in order to ship it.
If it's squishy then it's probably bad.
I buy ones that are slightly soft to the touch and I find them sweeter.

The flesh and the seeds of the fruit is edible.
Cut the fruit into slices.
And then you can peel the skin away from the flesh to eat it :)

Thursday, 3 April 2014 Agg
 So you might have seen this in the supermarket and wondered what are they and how do you eat it.
Some find dragon fruits tasteless but I find them sweet.
They're also very easy to eat.

Because the fruits are imported from far away from where I live, I find that most of the time the fruit is a bit bland. I suppose it's one of those fruits that don't hold it's flavour as well. Once in a while, I'll get lucky and get one with more flavour and sweetness.
Hopefully just because it's picked before it's ripe doesn't make it lose too much nutritional value.

So how to choose the fruit?
Look for a fruit without spots and is not too hard and not too soft.
Unless you live in a country that grows the fruit, chances are most of them are on the harder side because they pick the fruit before it's ripe in order to ship it.
If it's squishy then it's probably bad.
I buy ones that are slightly soft to the touch and I find them sweeter.

The flesh and the seeds of the fruit is edible.
Cut the fruit into slices.
And then you can peel the skin away from the flesh to eat it :)

Friday, 28 March 2014

I love eating fish balls, squid balls, beef balls etc, but I was never very fond of eating fish paste by just cooking it as is.
Even though fish balls is made from the paste, when the manufacturing companies make the balls, they add more things into it to make it springy rather then soft.
So if we have fish paste lying around, I would cook it with something rather then eat it on it's own.

This "pancake" is a nice way to change the texture of the paste and adds flavour to it.


Ingredients
Half a tub of Fish Paste
3 Eggs
1/2 tsp to 1 tsp of white pepper powder (to taste)
1/8 tsp of salt


Directions
1. Use a fork and stir the fish paste to mix it up and break it loose
2. Scramble the eggs, add the white pepper and salt to it
3. Add the egg very very little at a time to the fish paste in it's container. Mix well after every addition.
You'll probably want to add about half an egg every time you add and mix or else it'll be very hard to mix.
If you find that it's not mixing very well because you poured too much egg, do a folding motion to help incorporate some of the egg and keep folding until you're at a point that you can stir to mix well.

4. Once all the Egg is incorporated, heat up your pan to medium heat.
I used my cast iron griddle and I was able to cook everything at once.
5. Oil the pan and pour the mixture like you're cooking pancakes onto the pan.
They should be able 3 bite sizes.
6. Cook them like you would pancakes, wait for 1 side to set (you can tell by the edge), then flip it over
7. They will expand when you cook, brown both sides nicely and you're done!
:)

Tip: I like using the container to mix as I find it easier, if you start with a full container and need to use a bowl, find one that is similar size to the container. If you use a big bowl it's actually harder to mix.

Friday, 28 March 2014 Agg
I love eating fish balls, squid balls, beef balls etc, but I was never very fond of eating fish paste by just cooking it as is.
Even though fish balls is made from the paste, when the manufacturing companies make the balls, they add more things into it to make it springy rather then soft.
So if we have fish paste lying around, I would cook it with something rather then eat it on it's own.

This "pancake" is a nice way to change the texture of the paste and adds flavour to it.


Ingredients
Half a tub of Fish Paste
3 Eggs
1/2 tsp to 1 tsp of white pepper powder (to taste)
1/8 tsp of salt


Directions
1. Use a fork and stir the fish paste to mix it up and break it loose
2. Scramble the eggs, add the white pepper and salt to it
3. Add the egg very very little at a time to the fish paste in it's container. Mix well after every addition.
You'll probably want to add about half an egg every time you add and mix or else it'll be very hard to mix.
If you find that it's not mixing very well because you poured too much egg, do a folding motion to help incorporate some of the egg and keep folding until you're at a point that you can stir to mix well.

4. Once all the Egg is incorporated, heat up your pan to medium heat.
I used my cast iron griddle and I was able to cook everything at once.
5. Oil the pan and pour the mixture like you're cooking pancakes onto the pan.
They should be able 3 bite sizes.
6. Cook them like you would pancakes, wait for 1 side to set (you can tell by the edge), then flip it over
7. They will expand when you cook, brown both sides nicely and you're done!
:)

Tip: I like using the container to mix as I find it easier, if you start with a full container and need to use a bowl, find one that is similar size to the container. If you use a big bowl it's actually harder to mix.