Monday 28 September 2015


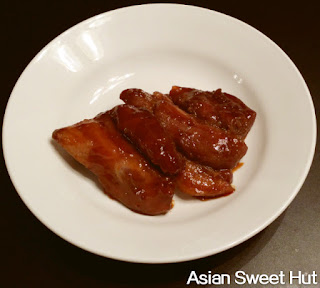
It's true you can buy the Lee Kum Kee Char Siu sauce from the supermarket but honestly, I usually have all the ingredients I need to make it, so I just make it whenever I need.
I typically make it, then use it to marinate something and freeze it.

The color of your Char Siu will not be as bright as what you buy from stores. The only way to make it that bright color is to use food coloring which I refuse to do. But when you eat it, you can totally tell it's char siu. :)

Char Siu sauce can be use to make Char Siu or you can just use it to cook other items like spare ribs.

叉燒醬 Chinese BBQ Pork Sauce

Prep time ~5mins

Ingredients 

  • 30g (2 tablespoons) soy sauce
  • 25g (1 tbsp) oyster sauce,
  • 20g (1 tbsp) hoisin sauce,
  • 15g (1 tbsp) wine
  • 30g (3 tbsp) brown sugar
  • 5g (1 tsp) garlic
  • 85g (1/4 cup) honey,
  • 1/4 tsp salt
  • 1/4 tsp  5 spice powder

Directions

  1. Measure all the ingredients and mix it together
  2. Store in jar or use right away

This amount will  fit into a small mason jar.
It will also marinate 3lbs of pork butt to make into char siu.
Monday 28 September 2015 Agg

It's true you can buy the Lee Kum Kee Char Siu sauce from the supermarket but honestly, I usually have all the ingredients I need to make it, so I just make it whenever I need.
I typically make it, then use it to marinate something and freeze it.

The color of your Char Siu will not be as bright as what you buy from stores. The only way to make it that bright color is to use food coloring which I refuse to do. But when you eat it, you can totally tell it's char siu. :)

Char Siu sauce can be use to make Char Siu or you can just use it to cook other items like spare ribs.

叉燒醬 Chinese BBQ Pork Sauce

Prep time ~5mins

Ingredients 

  • 30g (2 tablespoons) soy sauce
  • 25g (1 tbsp) oyster sauce,
  • 20g (1 tbsp) hoisin sauce,
  • 15g (1 tbsp) wine
  • 30g (3 tbsp) brown sugar
  • 5g (1 tsp) garlic
  • 85g (1/4 cup) honey,
  • 1/4 tsp salt
  • 1/4 tsp  5 spice powder

Directions

  1. Measure all the ingredients and mix it together
  2. Store in jar or use right away

This amount will  fit into a small mason jar.
It will also marinate 3lbs of pork butt to make into char siu.

Monday 14 September 2015


I love KBBQ ribs but it's very expensive to order when you're at the restaurant. So I asked my Korean friend how he makes his KBBQ ribs.
And his response was, it's simple, just throw in everything, blend and marinate it overnight and then cook it.
He was able to give me a list of all the ingredients but he was not able to give me the amounts since he never measures it.
I tried the same and I found that generally, the taste is very similar as long as I don't go overboard on any one of the ingredients (ie half a finger of ginger, too much soy sauce etc).
So I took the time to measure and test the recipe and tested it on my husband until he thought it matches fairly well.

Another note I wanted to make up front is what I used for the sweetener.
He uses only honey, it has a unique flavour and it thickens the sauce!
Honey will make the sauce nice and thick and clingy which makes it easier to use to marinate. But at the same time, honey can be very expensive depending on you live. So my recipe below uses a bit of brown sugar to replace some of the honey but you can always swap it out for pure honey.

So this post will cover the marinate itself. You can make a big batch and keep it in the fridge or freeze it for future use or just make it as you need.

Korean BBQ Sauce

Prep Time: <5 mins Makes enough to cover about 500g of ribs pending on the box/bag you're using for marinating

Ingredients

  • 40g Soy Sauce
  • 5g Ginger
  • 10g Garlic
  • 2 Green Onion
  • 20g Honey
  • 10g Brown Sugar
  • Juice from Half a Lemon
  • 10g Vinegar
  • 40g Water

Directions

  1. Measure and put all the ingredients into a blender and blend
  2. Let the foam settle, after 10 mins or so, stir the foam and bits into the sauce if it doesn't mix in on it's own
  3. Use right away or save in fridge or freezer. Shelf life is shorter then what you buy because there's no preservatives
Simple right? :)

Enjoy!
Monday 14 September 2015 Agg


I love KBBQ ribs but it's very expensive to order when you're at the restaurant. So I asked my Korean friend how he makes his KBBQ ribs.
And his response was, it's simple, just throw in everything, blend and marinate it overnight and then cook it.
He was able to give me a list of all the ingredients but he was not able to give me the amounts since he never measures it.
I tried the same and I found that generally, the taste is very similar as long as I don't go overboard on any one of the ingredients (ie half a finger of ginger, too much soy sauce etc).
So I took the time to measure and test the recipe and tested it on my husband until he thought it matches fairly well.

Another note I wanted to make up front is what I used for the sweetener.
He uses only honey, it has a unique flavour and it thickens the sauce!
Honey will make the sauce nice and thick and clingy which makes it easier to use to marinate. But at the same time, honey can be very expensive depending on you live. So my recipe below uses a bit of brown sugar to replace some of the honey but you can always swap it out for pure honey.

So this post will cover the marinate itself. You can make a big batch and keep it in the fridge or freeze it for future use or just make it as you need.

Korean BBQ Sauce

Prep Time: <5 mins Makes enough to cover about 500g of ribs pending on the box/bag you're using for marinating

Ingredients

  • 40g Soy Sauce
  • 5g Ginger
  • 10g Garlic
  • 2 Green Onion
  • 20g Honey
  • 10g Brown Sugar
  • Juice from Half a Lemon
  • 10g Vinegar
  • 40g Water

Directions

  1. Measure and put all the ingredients into a blender and blend
  2. Let the foam settle, after 10 mins or so, stir the foam and bits into the sauce if it doesn't mix in on it's own
  3. Use right away or save in fridge or freezer. Shelf life is shorter then what you buy because there's no preservatives
Simple right? :)

Enjoy!

Tuesday 8 September 2015


Have you ever seen these at grocery stores and wonder what to do with them? How they taste like?
I live in Canada and I remember the first time I saw them at the grocery store was several years ago.
It was on demo, I tried it and fell in love with it.

Since then, I've seen the popularity of this mushroom grow. I now see it in restaurant dishes (both Asian and non Asian places) and I see more groceries stores carrying it. However I noticed a lot of people still don't know what it is and after so many years, it's still one of the demo booths I see at the grocery store every week. So I thought I would do a quick post on how easy it can be to cook these tasty mushroom.

Even though I first found these in an Asian grocery store, they are actually native Mediterranean, Middle Eastern and Northern African plants. It became popular in Asian and now different Asian countries also grow it.

How to store?
If you're not eating it right away, take it out of the tray and plastic wrap and put it into a paper bag. Then place it in the fridge. If you leave it in the tray, sometimes you'll find something fuzzy on it. That's still safe to eat but I find you avoid that if you put it in the paper bag.

Here's a super simple way to cook the mushroom to try it's flavour and texture.

King Oyster Mushrooms

Prep Time: <5 mins Cook Time: ~5 mins

Ingredients

  • 1 package of King Oyster mushrooms, normal or baby size works
  • 1 green onion
  • 1/2 tsp minced garlic
  • Dash of oil
  • Salt and pepper to taste
  • Optional sesame oil

Directions

  1. Rinse the mushrooms
  2. Cut into slices as shown in the picture to the right with the white line.
  3. Cut the green onion into strips
  4. Heat up a pan to medium heat
  5. Add oil to the hot pan to help make it non-stick and add the garlic and white part of green onion and stir
  6. Count to 30 and add in the mushrooms
  7. The mushrooms will start turning more translucent as it's being cooked. Add in the green onion when the mushroom is about 75% done, just the centre is still the original raw color.
  8. Add some cracked salt and pepper to taste and you're done!

The sesame oil is optional because it's a very strong flavour and it can over power the mushroom if you're trying to figure out how it taste like. But adding a little gives it extra fragrance.
Simply, yummy and fast!
Enjoy


Tuesday 8 September 2015 Agg

Have you ever seen these at grocery stores and wonder what to do with them? How they taste like?
I live in Canada and I remember the first time I saw them at the grocery store was several years ago.
It was on demo, I tried it and fell in love with it.

Since then, I've seen the popularity of this mushroom grow. I now see it in restaurant dishes (both Asian and non Asian places) and I see more groceries stores carrying it. However I noticed a lot of people still don't know what it is and after so many years, it's still one of the demo booths I see at the grocery store every week. So I thought I would do a quick post on how easy it can be to cook these tasty mushroom.

Even though I first found these in an Asian grocery store, they are actually native Mediterranean, Middle Eastern and Northern African plants. It became popular in Asian and now different Asian countries also grow it.

How to store?
If you're not eating it right away, take it out of the tray and plastic wrap and put it into a paper bag. Then place it in the fridge. If you leave it in the tray, sometimes you'll find something fuzzy on it. That's still safe to eat but I find you avoid that if you put it in the paper bag.

Here's a super simple way to cook the mushroom to try it's flavour and texture.

King Oyster Mushrooms

Prep Time: <5 mins Cook Time: ~5 mins

Ingredients

  • 1 package of King Oyster mushrooms, normal or baby size works
  • 1 green onion
  • 1/2 tsp minced garlic
  • Dash of oil
  • Salt and pepper to taste
  • Optional sesame oil

Directions

  1. Rinse the mushrooms
  2. Cut into slices as shown in the picture to the right with the white line.
  3. Cut the green onion into strips
  4. Heat up a pan to medium heat
  5. Add oil to the hot pan to help make it non-stick and add the garlic and white part of green onion and stir
  6. Count to 30 and add in the mushrooms
  7. The mushrooms will start turning more translucent as it's being cooked. Add in the green onion when the mushroom is about 75% done, just the centre is still the original raw color.
  8. Add some cracked salt and pepper to taste and you're done!

The sesame oil is optional because it's a very strong flavour and it can over power the mushroom if you're trying to figure out how it taste like. But adding a little gives it extra fragrance.
Simply, yummy and fast!
Enjoy