This is my first post in my Chinese Soup series.
When you start making Chinese soup, you'll start collecting a lot of different types of dried goods.
Some items like Apricot Kernels and Honey Dates are more often used then others like Dried Octopus. You will start to accumulate lots of dried goods over time. I find it very convenient to be well stocked as it requires less planning when deciding what soup to make.
Couple of things to pay attention to when you get started with the dried ingredients:
Chinese vs English names
In my soup recipes, I'll always post both the Chinese and English name that you may find on the label. My advice is to copy Chinese words because I find that sometimes the English name may vary or the English name on the label actually refers to the family of the item and not the specific thing.
For example, Apricot Kernels in the picture above both have the same English name with 2 different Chinese names because they're different from one an other! The one that says "北杏" is bitter and actually considered "poisonous" in Chinese herbal cooking, you shouldn't be using a lot of it unlike the other one! The ratio of 南杏 and 北杏 should be about 3:1. My grandma says it's even ok to make soup without 北杏. So if your soup calls for Apricot Kernels and you relied on the English name, you could have grabbed the wrong bag if all you get is one type.
Supermarket vs Herbal Shops
There are many places you can buy the herbal ingredients. You can pretty much walk into any big Chinese supermarket and there will be an aisle or 2 of dried goods for soup and for cooking. What it really comes down to are 3 things, price, quality and trust. There are some items I will grab at the grocery store because it's convenient and they are labeled in Chinese and English. But there are others that I will go to the Chinese Herbal store to get due to the nature of the item so I want to ensure high quality. Also, grocery store doesn't necessarily equate to cheaper! I've found items there that are more expansive then at the herbal store!
Finding a good herbal store is very very important if you want to get into making Chinese soups. The first herbal store I went to was very impolite and not helpful at all, the second one was really aggressive trying to sell me everything they can get their hands on. The one I go to now is the one my grandma introduced me to. She likes that particular store because the items are good quality and the owner is honest. I'm very fortunate to have my grandma introduce me, but I know not everyone can get that introduction. If you're serious about trying the herbal soups, spend a little bit of time to check out a couple of stores. Compare items from store to store to check quality, price and honesty of the people there. Helpful but non-aggressive clerks are very important when you're new to herbal items. Dried goods are not cheap! It will pay off in the long run to do research before you buy.
The other nice thing about herbal stores is the personal touch. They can teach you how to use the ingredients you're buying! There's so many ways and so many variations of different soups and dishes you can make, so it's great to talk to them and learn new methods.
Set packages vs "loose" items
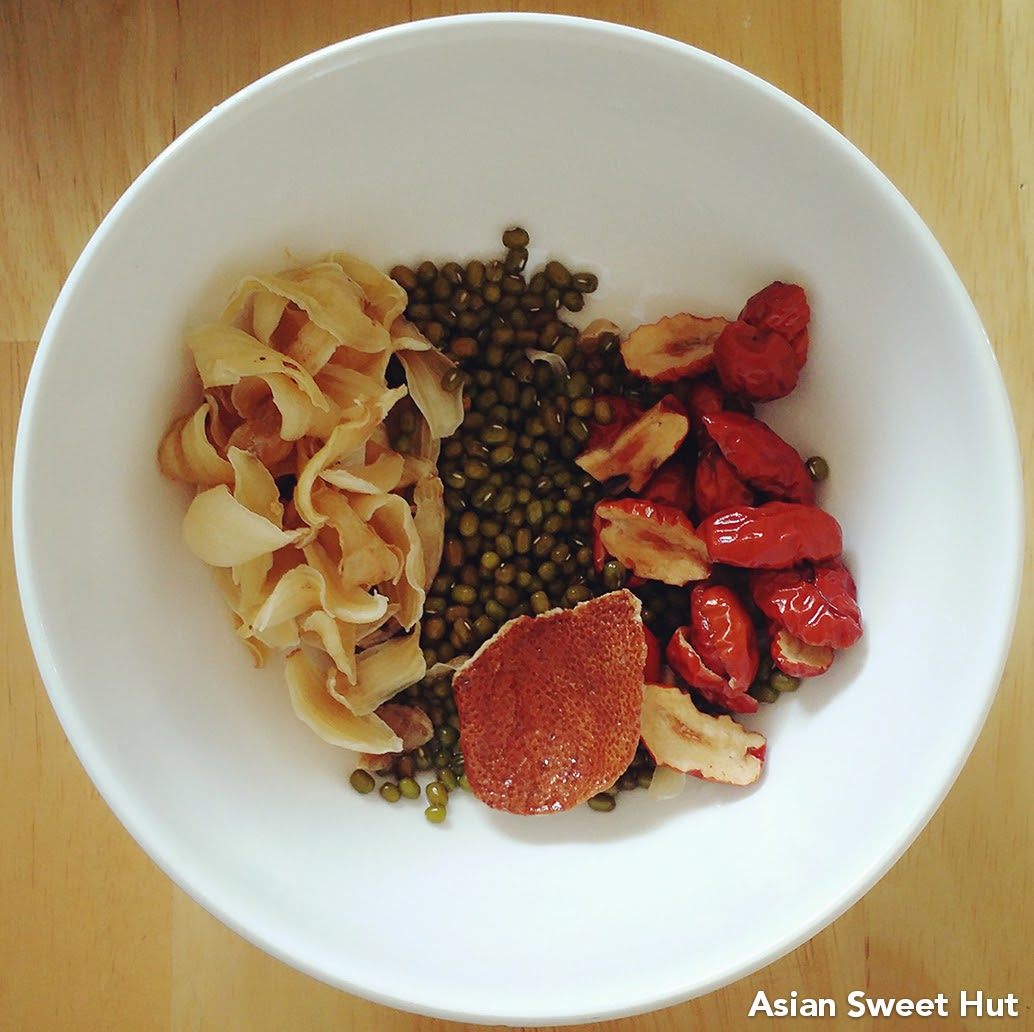
You can find set packages like the one you see on the left in supermarkets and herbal stores! There's always pros and cons to everything. Soup packages are set for 1 pot of soup. So it's great if you're trying out Chinese soup and you're unsure if you want to buy so much ingredients if you may not make it again. I find some packages of soup even have directions for type of meat and/or veggies to add and how long to cook. Some don't have much info, so you really need to know the ingredients in order to use it. Some supermarket even soup packages in the refrigerator section where they have the meat and veggies all cut up with combine with packages of herbal items ready for you to buy and throw into a pot to cook!
Why you will buy packages vs individual comes down to a couple of decisions. If you're in this for the long haul, it'll cost less to buy all the individual items then these packages. Also, quality of the goods is hard to judge in these packages. Some people argue it's fine and others will argue that you'll get better items if you go to the herbal store. It's really a toss up between the 2. If you know a good herbal store, then you'll probably get better quality for the same amount of money.
Variety is another good reason to get individual packages. Once you start making herbal soup, you'll realize there can be may variations and mix and matches of items you can use for the soup.
How to store
Now that you've spent good money on the dried goods, you want to make sure it doesn't go bad when you're not using it. Soup packages are one time use, so as long as you don't open them until you're ready to use them, you're fine.
For all the loose items, you need to keep them in a
cool dried area. A cool room is the best if you have one! I don't have one so when I open a package, I will put all the items in jars to try to keep moisture out.
Generally you will not need to keep things in the fridge as long as you can keep it cool and dried. If you put something in the fridge, then it has to stay there until it's all used up. The only thing I keep in the fridge are the dried figs. Everything else is bottled or sealed in bags. The first image in this post is a shelf in my dried goods cabinet. Thank goodness for food saver to reseal packages because I don't nearly have enough jars for everything.
And that's the basics of it to get started! If you currently have nothing at all for dried goods, don't try to go out and buy everything all at once. Your wallet will cry if you do that. When you're starting up, just buy as you need. Slowly build up your collection. Your wallet will thank you for it.


